TL;DR:
- Home decaffeination methods reduce caffeine by only 15 to 30 percent, not nearly as much as commercial processes.
- Though they can help lessen caffeine intake, they also cause flavor loss and cannot match industrial decaffeination efficiency.
Home decaffeination is defined as the process of reducing caffeine in already-roasted coffee grounds using water-based methods before or during brewing. You can learn how to decaffeinate coffee at home, but the results are partial. Home methods reduce caffeine by only 15–30%, while commercial processes like the Swiss Water Process and supercritical CO2 extraction remove 97–99.9% of caffeine from green beans. That gap matters. This guide covers what each DIY method actually does, where it falls short, and how to get the best cup possible from partially decaffeinated coffee.
What do you need to decaffeinate coffee at home?
The right setup makes a real difference in how much caffeine you can pull out before brewing. You do not need specialty lab equipment, but a few basics are non-negotiable.
Kitchen tools you need:
- A French press or pour-over dripper with a fine mesh filter
- A kettle with temperature control (or a thermometer)
- A timer
- A fine-mesh strainer or paper filters for straining pre-soak water
- A heat-safe bowl or pitcher for discarding the initial soak water
Coffee and water specifics:
Water quality directly affects extraction. Use filtered water when possible. Hard tap water with high mineral content can interfere with how caffeine dissolves during the pre-soak phase. Water temperature matters too. Hot methods work best between 195°F and 205°F. Cold soak methods use room-temperature water, around 68°F to 72°F.
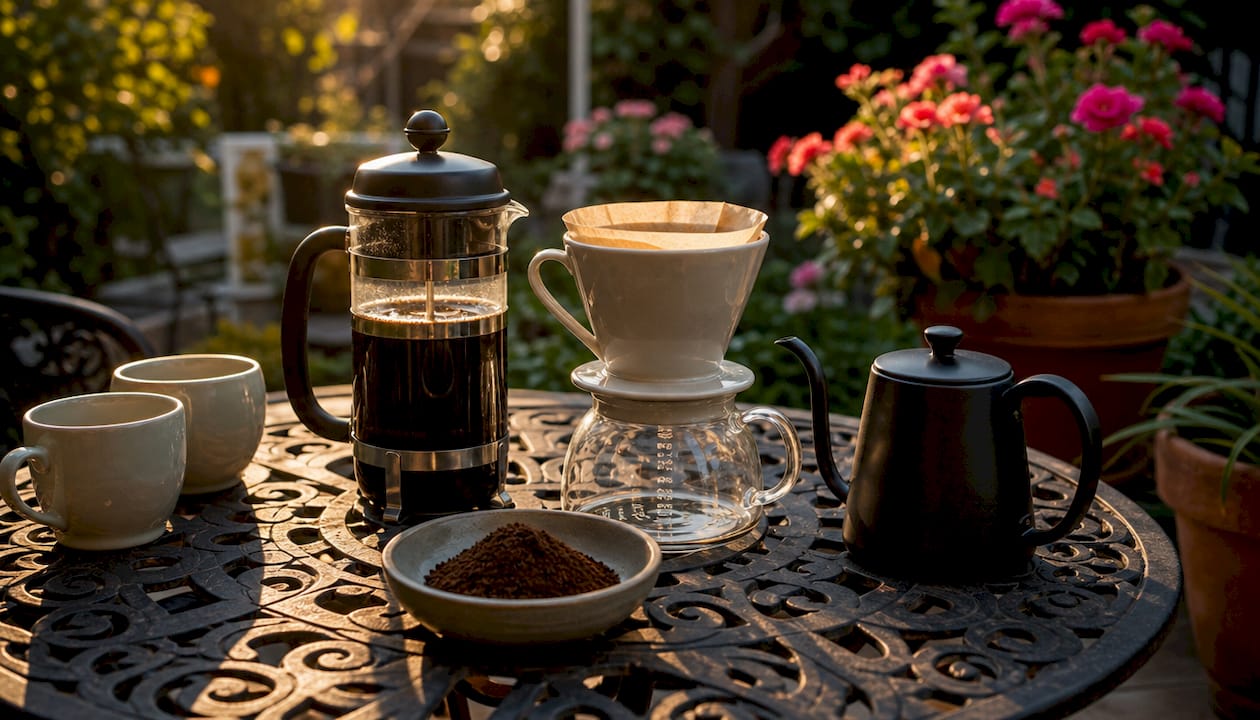
Use roasted ground coffee for home methods. Green (unroasted) beans are what commercial facilities process, and working with them at home is impractical without specialized equipment. A medium grind works well for most DIY techniques. Finer grinds increase surface area and pull out more caffeine during the soak, but they also extract more bitterness.
What you cannot replicate at home:
Consumer-grade activated charcoal from pet stores or supplement aisles is not food-safe for beverage decaffeination. The Swiss Water Process uses specialized food-grade activated carbon in a controlled industrial setting. Trying to mimic that at home with off-the-shelf charcoal is both ineffective and potentially unsafe.
| Tool | Purpose | Required? |
|---|---|---|
| French press or pour-over | Brewing after pre-soak | Yes |
| Temperature-controlled kettle | Precise hot water for soak | Strongly recommended |
| Fine-mesh strainer | Removing soak water cleanly | Yes |
| Timer | Consistent soak duration | Yes |
| Food-grade activated carbon | Selective caffeine filtration | Not available to home users |
How do you decaffeinate coffee at home step by step?
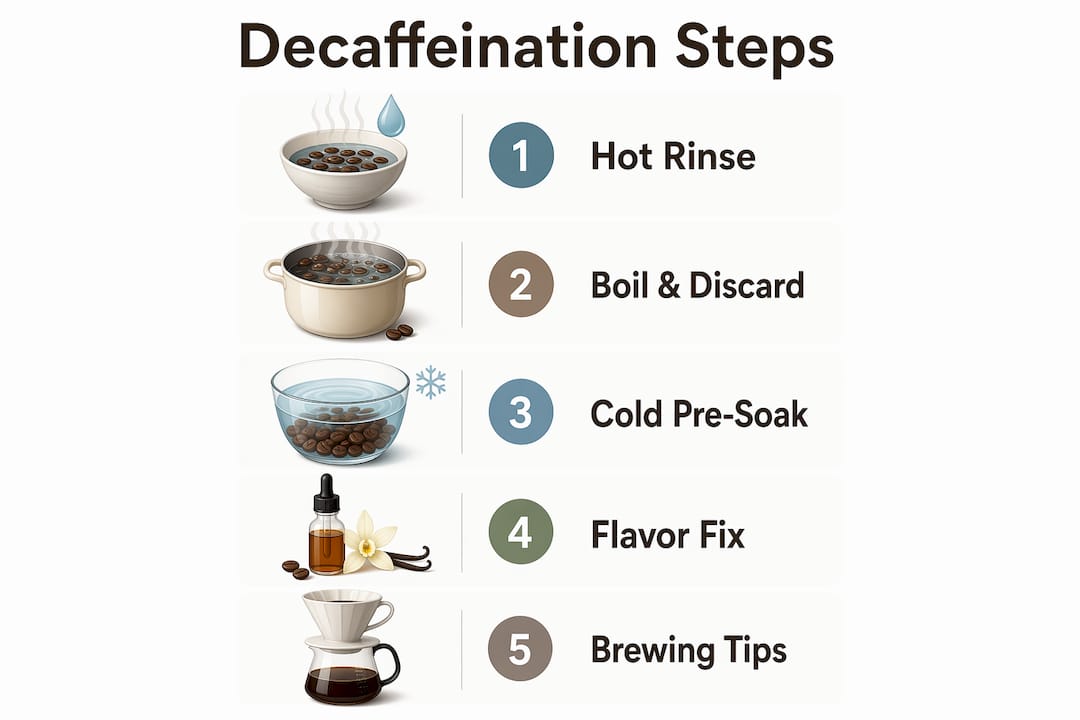
Three methods work for partial caffeine reduction at home: the hot rinse, the boil-and-discard, and the cold pre-soak. Each trades caffeine removal against flavor in a different way.
Hot rinse method
The hot rinse method is the most common DIY approach. It involves a brief pre-brew soak that pulls out some caffeine before you brew your actual cup.
- Measure your ground coffee into a French press or pour-over filter.
- Pour hot water (195°F to 205°F) over the grounds to saturate them fully.
- Let the grounds soak for 30–60 seconds.
- Discard the soak water completely. Do not drink it.
- Immediately brew fresh hot water through the same grounds as you normally would.
- Serve and drink the brewed coffee.
The logic here is that caffeine is highly water-soluble and begins dissolving within the first 30 seconds of contact with hot water. Discarding that first water removes a portion of the caffeine before your actual brew begins. The tradeoff is that aromatic oils also start dissolving in those first seconds, so some flavor goes with the caffeine.
Pro Tip: Use slightly more coffee than your usual dose, about 10–15% more, to compensate for the flavor compounds lost during the pre-soak.
Boil-and-discard method
This method extracts more caffeine but hits flavor harder. Boiling and discarding flattens the cup noticeably, leaving coffee tasting weaker and blunter.
- Add ground coffee to a small saucepan with water (use a 1:10 coffee-to-water ratio by weight).
- Bring to a gentle simmer over medium heat.
- Simmer for 3–4 minutes, stirring occasionally.
- Strain out the grounds using a fine-mesh strainer. Discard the liquid.
- Return the strained grounds to your French press or pour-over.
- Brew normally with fresh hot water.
This method removes more caffeine than the hot rinse because the extended heat exposure and agitation pull caffeine out more aggressively. The problem is that heat also degrades volatile aromatic compounds. The resulting cup is noticeably flat. Use this method only when caffeine reduction is the priority and flavor is secondary.
Cold pre-soak method
The cold pre-soak removes less caffeine than hot methods but better preserves delicate flavors. It works well for light roasts where floral and fruity notes matter.
- Place ground coffee in a bowl or jar.
- Add room-temperature filtered water to fully saturate the grounds.
- Let the grounds soak for 15–30 minutes at room temperature.
- Strain out the soak water and discard it.
- Transfer the damp grounds to your brewer and brew normally with hot water.
Caffeine dissolves more slowly in cold water, so the soak pulls out less of it. That is the tradeoff. You get better flavor retention but a smaller caffeine reduction. For someone who wants a lighter evening cup without sacrificing too much taste, this is the most practical option.
Pro Tip: For the cold pre-soak, extend the soak to 45 minutes if you want slightly more caffeine removed. Beyond that, you risk extracting bitter compounds even at room temperature.
Why can’t you fully decaffeinate coffee at home?
Full decaffeination is not achievable in a home kitchen. The gap between DIY and commercial results is not a matter of effort. It is a matter of chemistry and equipment.
Commercial decaffeination starts with green (unroasted) beans, not roasted grounds. Caffeine is far easier to extract from green beans because the cell structure has not been altered by roasting. The Swiss Water Process works by saturating green beans in a Green Coffee Extract that is already loaded with all coffee compounds except caffeine. Because the extract is already saturated with flavor molecules, it pulls out only caffeine from the beans. The caffeine-laden extract then passes through food-grade activated charcoal filters, which trap the caffeine. The cleaned extract cycles back through the beans repeatedly until caffeine levels drop below 0.1%.
“Achieving chemical equilibrium with green coffee extract to selectively extract caffeine requires laboratory conditions. Maintaining a stable extraction temperature of 93°C and managing caffeine concentration in solution is nearly impossible in a home kitchen environment.”
Maintaining that 93°C stability is the core problem. A home stovetop fluctuates constantly. Even a few degrees of variation changes how caffeine and flavor compounds dissolve. Industrial facilities use closed-loop systems with precise temperature control that no home setup can replicate.
Supercritical CO2 extraction and solvent-based methods (using ethyl acetate or methylene chloride) require pressurized vessels and controlled chemical environments. These are not kitchen-scale processes under any circumstances.
The flavor preservation difference is also significant. DIY methods remove aromatic oils alongside caffeine because home processes cannot selectively target caffeine. Commercial methods, especially the Swiss Water Process, preserve far more of the bean’s original flavor profile because the Green Coffee Extract acts as a buffer for those flavor compounds.
| Method | Caffeine removed | Flavor impact | Feasible at home? |
|---|---|---|---|
| Hot rinse (DIY) | 15–30% | Moderate loss | Yes |
| Boil-and-discard (DIY) | Up to 30% | High loss | Yes |
| Cold pre-soak (DIY) | 10–20% | Low loss | Yes |
| Swiss Water Process | 97–99.9% | Minimal loss | No |
| Supercritical CO2 | 97–99.9% | Very minimal loss | No |
One more fact worth knowing: even commercial decaf contains 2–5 mg of caffeine per cup. No method, industrial or home-based, produces a completely caffeine-free cup. That matters for anyone with extreme caffeine sensitivity.
How to fix the flavor after a DIY decaf process
Flavor loss is the biggest practical problem with home decaffeination. You can recover a lot of it with the right brewing adjustments.
Dose and grind adjustments:
- Increase your coffee dose by 10–15% to restore body and aroma lost during the pre-soak.
- Grind slightly finer than usual to increase surface area and boost extraction during the brew phase.
- Avoid grinding too fine. Over-extraction amplifies bitterness, which is already more pronounced in stripped coffee.
Brewing method selection:
French press and cold brew both work well with partially decaffeinated grounds. French press keeps the coffee in contact with grounds longer, which helps rebuild body. Cold brew brewing techniques use a long, slow extraction that pulls out sweetness and smoothness even from grounds that have lost some aromatic oils.
Pour-over methods are less forgiving. The faster extraction time means less opportunity to compensate for flavor loss. If you use pour-over, slow your pour rate and extend the bloom phase to 45 seconds.
Bean selection matters:
Medium to dark roasts hold up better to DIY decaf methods than light roasts. The roasting process develops deeper, more resilient flavor compounds that survive a pre-soak better than the delicate floral notes in a light roast. If you want to explore coffee processing methods that naturally produce sweeter, more forgiving flavor profiles, washed and honey-processed coffees tend to respond better to DIY decaf techniques.
Pro Tip: Try blending your partially decaffeinated grounds with a small amount of commercially decaffeinated beans. A 50/50 blend gives you better caffeine reduction than DIY alone while keeping flavor closer to a normal cup.
Key Takeaways
Home decaffeination methods reduce caffeine by 15–30% at most, making them useful for light reduction but not a substitute for commercially processed decaf beans.
| Point | Details |
|---|---|
| Home methods are partial only | DIY techniques reduce caffeine 15–30%, not the 97–99.9% achieved commercially. |
| Hot rinse is the simplest method | A 30–60 second pre-soak with hot water removes some caffeine before brewing. |
| Flavor loss is unavoidable | Aromatic oils dissolve with caffeine; increase dose or grind finer to compensate. |
| Commercial methods need green beans | Swiss Water and CO2 processes require unroasted beans and industrial equipment. |
| Even decaf has some caffeine | Commercial decaf contains 2–5 mg per cup, so home results will always be higher. |
My honest take on DIY decaf
I have tried every home method covered here, and the honest verdict is this: they work, but not the way most people hope. The hot rinse is genuinely useful for someone who wants to take the edge off an evening cup without buying a separate bag of decaf. The caffeine reduction is real, even if it is modest.
The flavor hit is where most people give up. Boiling and discarding grounds produces coffee that tastes like it went through a rough day. The cold pre-soak is the gentlest option, and I reach for it most often when I want something drinkable after 7 PM without lying awake at 2 AM.
What I tell caffeine-sensitive readers is this: if you need genuine caffeine removal, buy commercially processed decaf. The Swiss Water Process exists precisely because home methods cannot do the job. Pregnancy, heart conditions, or severe caffeine sensitivity all call for the real thing, not a 20% reduction from a pre-soak.
Where DIY decaf actually shines is in the middle ground. You enjoy coffee, you are not medically required to avoid caffeine, but you want a lighter load in the afternoon. That is exactly the use case these methods were made for. Experiment with the blend approach. Mix your hot-rinsed grounds with a scoop of commercial decaf and you get a cup that is both drinkable and genuinely lower in caffeine.
— zachary
Quality decaf starts with quality beans
If you have worked through the DIY methods and want a better baseline to start from, the beans you choose matter as much as the technique.

Zscoffee carries a range of coffee and tea products including options suited to caffeine-conscious drinkers. Whether you want a quality decaf to blend with your home-processed grounds or a single-origin bean that holds up well to pre-soak methods, the catalog covers both. Zscoffee ships internationally and makes it easy to find the right roast for your brewing style. Browse the full product selection and find a coffee that works with your caffeine goals, not against them.
FAQ
How much caffeine does home decaffeination actually remove?
Home methods remove 15–30% of caffeine at most. Commercial processes like the Swiss Water Process remove 97–99.9%.
Does decaf coffee still contain caffeine?
Yes. Commercial decaf contains 2–5 mg of caffeine per cup, so home-processed coffee will always contain more than that.
Which home method removes the most caffeine?
The boil-and-discard method removes the most caffeine of the three DIY options. The tradeoff is significant flavor loss compared to the hot rinse or cold pre-soak.
Can you use activated charcoal at home to decaffeinate coffee?
No. Consumer-grade activated charcoal is not food-safe for beverage decaffeination. The Swiss Water Process uses specialized industrial-grade activated carbon that is not available to home users.
What brewing method works best with home-decaffeinated coffee?
French press and cold brew work best. Both use longer extraction times that help rebuild body and sweetness lost during the pre-soak phase. You can find detailed home brewing techniques to get the most from your adjusted grounds.