TL;DR:
- Blending multiple carefully chosen beans creates a more balanced and complex cup than single-origin coffee. Using a base, body, and high note bean in ratios like 60/30/10 helps develop flavor, especially when blending post-roast for greater control. Maintaining a blending journal and experimenting with small batches enables continuous improvement and personalized coffee profiles.
Single-origin coffee is genuinely great. But once you start applying practical coffee blending tips to your home brewing routine, something clicks. You realize that combining two or three carefully chosen beans can produce a cup more balanced, complex, and personal than any single origin alone. Blending lets you chase a flavor profile you have in your head rather than settling for whatever’s on the shelf. This guide walks you through bean selection, ratios, common mistakes, and sample recipes so you can start creating blends worth repeating.
Table of Contents
- Key takeaways
- 1. Understand the three-bean framework for coffee blending tips
- 2. Match your roast levels strategically
- 3. Choose pre-roast or post-roast blending
- 4. Set your starting ratios before experimenting
- 5. Mix whole beans before grinding
- 6. Common mistakes that kill a blend’s potential
- 7. Build a blending journal into your workflow
- 8. Three starter blend recipes to try right now
- 9. Store your beans correctly or lose your work
- My honest take on why blending changed how I drink coffee
- Start your blending journey with Zscoffee
- FAQ
Key takeaways
| Point | Details |
|---|---|
| Use a three-bean structure | Most successful blends use a base, body, and high note bean, each filling a distinct flavor role. |
| Start with a 60/30/10 ratio | Allocate roughly 60% base, 30% body, and 10-20% high note bean as your first reference point. |
| Post-roast blending is safer for beginners | Mixing already-roasted beans lets you control each component’s roast level independently. |
| Keep a blending journal | Recording every ratio and result helps you repeat wins and avoid repeating failures. |
| Blend whole beans before grinding | Mixing before grinding produces more consistent extraction than blending pre-ground coffees. |
1. Understand the three-bean framework for coffee blending tips
Before you measure a single gram, you need to know why most good blends share a similar architecture. Successful blends use three roles: a base bean, a body bean, and a high note bean. Each does a specific job, and ignoring one leaves a noticeable gap in the cup.
The base bean is the foundation. It typically contributes sweetness, low acidity, and a chocolate or nutty undertone. Brazilian Naturals are the classic choice here because they carry caramel sweetness with almost no harsh edges.
The body bean adds weight and texture. Think earthiness and a heavy mouthfeel that makes the coffee feel satisfying rather than watery. Indonesian origins like Sumatra or Sulawesi are reliable body beans, bringing rich, savory depth.
The high note bean is your accent. It adds brightness, fruitiness, or floral complexity and typically makes up the smallest share of the blend. Ethiopian single origins are the go-to for this role because of their natural berry and citrus characteristics. Understanding these roles is the single most important coffee blend creation step you can take before anything else.
2. Match your roast levels strategically
Roast level is where a lot of home blenders go wrong without realizing it. Light roasts highlight acidity and brightness, while dark roasts deliver depth and body sweetness. Combining them can create contrast, but it’s genuinely harder to balance than most guides admit.
If you’re starting out, blend beans with similar roast levels. A medium base paired with a medium-dark body bean and a light-medium high note bean sits in a workable range. The flavors complement each other without one component overpowering the others.
As you get more comfortable, you can experiment with what roasters call a mélange approach. That means intentionally mixing different roast levels for contrast. Just know going in that a very dark bean will dominate the cup quickly, so keep its percentage low.
You can explore how origin and roast interact by reading up on types of coffee beans across different regions. Knowing what a Yirgacheffe tastes like at light roast versus a Sumatra at dark roast before blending them saves you a lot of wasted coffee.
3. Choose pre-roast or post-roast blending
This is a decision point every home blender hits eventually. Pre-roast blending mixes green beans before roasting; post-roast blending combines already-roasted beans. Both are legitimate, but they produce different results and suit different situations.
Pre-roast blending gives you a uniform roast across all beans in the batch. The downside is that different bean varieties often need different roast times and temperatures to hit their peak. When you blend them green and roast together, you’re making a compromise.
Post-roast blending solves that problem. You roast each component to its ideal development level, then measure and combine afterward. For home brewers without a commercial roaster, this is the better approach. You have full control, and you can taste each component before committing to a ratio.
4. Set your starting ratios before experimenting
Ratios feel like guesswork until you have a starting point. A proven starting ratio is 50 to 60% base bean, 30 to 40% body bean, and 10 to 20% high note bean. This structure balances sweetness, weight, and brightness in a way that actually tastes like a coherent cup rather than a mess of competing flavors.
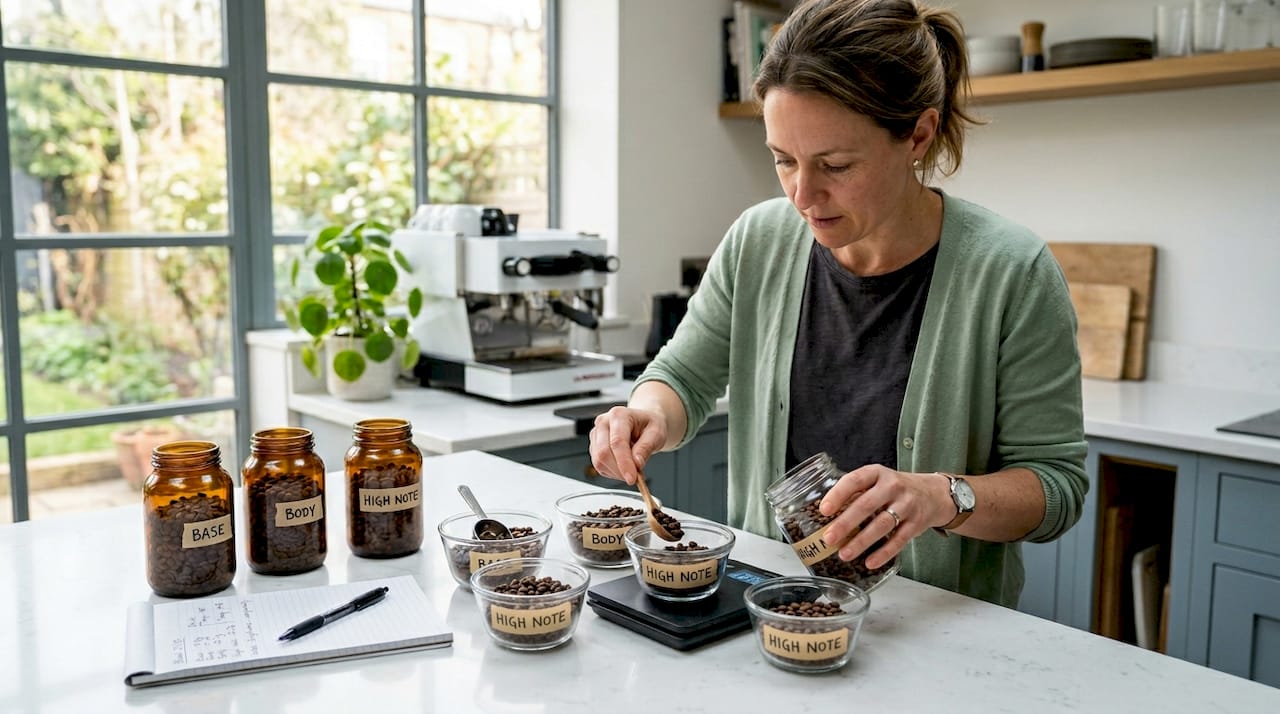
Why does the base bean get the majority share? Because it sets the tone. If you flip the percentages and let the high note bean dominate, you end up with a sharp, acidic brew that’s fatiguing to drink. The base keeps everything grounded.
Start at 60/30/10 for your first batch. Brew it. Taste it. Then adjust by 5% increments in a single direction. Small moves give you clear feedback. Large moves just create chaos.
Pro Tip: Always convert your ratios to grams using a kitchen scale. “A scoop” of one bean and “a scoop” of another looks consistent but rarely is. A 1:15 coffee-to-water ratio by weight also keeps your brew itself reproducible, so you’re only changing one variable at a time.
5. Mix whole beans before grinding
This one surprises people, but it matters. Blending whole beans before grinding produces more consistent extraction than grinding each bean separately and mixing the grounds afterward.
When you grind beans of different densities separately, you get two different particle size distributions. Mix them in the grounds stage and you’re essentially brewing two different coffees simultaneously, which makes dialing in extraction almost impossible.
Combine your whole beans in the correct ratio first, then grind the mixture together. The grinder handles the blending for you, and you end up with a more uniform grind bed. Your extractions become more predictable, and your tasting notes become more trustworthy.
6. Common mistakes that kill a blend’s potential
The mistakes below are not obvious until you’ve made them at least once. Knowing them ahead of time saves you a lot of frustrating batches.
- Using too many bean types. Three beans is the sweet spot for most blends. Four or five origins create muddled, unreadable flavors. Simpler blends produce better clarity and are much easier to adjust.
- Mixing wildly different roast levels. A light roast Ethiopian combined with a very dark Robusta will never feel balanced. The dark bean dominates at almost any ratio below 50%.
- Making large batches too early. If your first attempt uses 500 grams of each bean, you’re locked into that blend until it’s gone. Start with 50 to 100 gram test batches so you can iterate quickly.
- Not recording your work. If you stumble onto a great combination and didn’t write it down, it’s gone. Every adjustment, no matter how small, deserves a note.
- Grinding beans separately and then mixing. As covered above, this undermines extraction consistency and makes your tasting data unreliable.
Pro Tip: Treat your first three blends as data collection, not as attempts to nail a perfect cup. The goal is to understand how each change affects the flavor, not to produce something shelf-worthy on the first try.
7. Build a blending journal into your workflow
Keeping a coffee blending journal is what separates hobbyists who plateau from those who keep improving. Your journal does not need to be elaborate. A notebook or a simple spreadsheet works fine.
For each batch, record the bean names and origins, the roast level of each component, the exact gram weights and percentages, your brewing method and parameters, and your tasting notes. The notes don’t need to be technical. “Too sharp in the finish, reduce Ethiopian next time” is completely sufficient.
Over several iterations you’ll start seeing patterns. Maybe you always prefer less than 15% of your high note bean. Maybe medium-dark body beans consistently flatten your blends. These personal preferences are impossible to track without written records.
This coffee blend creation workflow, blending then brewing then tasting then adjusting and writing it down, compounds over time. Months in, you’ll have a personal recipe book that reflects exactly how you like coffee.
8. Three starter blend recipes to try right now
The fastest way to build intuition is to start with tested ratios rather than inventing from scratch. Here are three beginner blend recipes that cover different flavor goals.
| Blend Name | Ratio | Flavor Goal |
|---|---|---|
| Balanced Everyday | 60% Brazilian, 25% Colombian, 15% Ethiopian | Sweet, smooth, approachable |
| Classic Espresso | 60% Brazilian, 30% Indonesian, 10% Ethiopian | Heavy body, low acidity, espresso-friendly |
| Bright Fruity | 60% Ethiopian, 40% Colombian | High acidity, floral, light-bodied |
Use these as your baseline, not your destination. Taste each component bean on its own first so you understand what it contributes before combining them. Then brew the blend, compare it against your notes on the individual beans, and you’ll immediately understand what changed and why.
For more ideas on pairing flavors across origins, Zscoffee’s guide on coffee flavor pairing is a solid next read alongside these recipes.
9. Store your beans correctly or lose your work
All of this effort becomes pointless if your beans go stale. Proper storage in an airtight container, away from light and heat, and using beans within two to four weeks of roasting, preserves the flavors you’re blending for.
Stale coffee flattens. The acidity and brightness you counted on from your Ethiopian high note bean will disappear. What’s left is a dull, papery version of your blend that tastes nothing like your journal notes described.
Buy fresher beans in smaller quantities rather than hoarding large bags. When you’re running small test batches anyway, you don’t need more than 200 to 300 grams of each component at a time. Fresh stock combined with small batches keeps your blending experiments accurate.
My honest take on why blending changed how I drink coffee
I’ll be direct: I was skeptical of home blending for a long time. It felt like something professional roasters did with calibrated equipment, not something you could figure out in a kitchen with a scale and a notebook.
What changed my mind wasn’t reading about it. It was tasting a batch where I’d dialed my ratio from 15% to 10% Ethiopian and suddenly the blend went from “sharp and strange” to “exactly what I wanted.” That one adjustment told me more about flavor balance than months of reading tasting notes ever did.
What I’ve learned is that blending trains your palate faster than any other exercise. When you know you changed one variable, you taste more carefully. You stop drinking coffee on autopilot. You start noticing what body actually feels like, or what citrus brightness does at the back of your throat.
I also find blending useful across seasons. I lean toward brighter, lighter blends with higher Ethiopian ratios in warmer months and shift toward heavier, Indonesian-forward blends in winter. Your coffee can follow your mood, and there’s something genuinely satisfying about that level of control.
Don’t expect perfection in your first few batches. Expect information. That shift in expectation is what makes the process rewarding rather than frustrating. Embrace the gourmet coffee blend mindset early, and the craft pays you back quickly.
— zachary
Start your blending journey with Zscoffee
If you’re ready to put these coffee blending tips into practice, the beans you choose make all the difference.

Zscoffee carries a curated selection of single-origin coffees across the Brazilian, Colombian, Ethiopian, and Indonesian origins that form the backbone of most great home blends. Whether you need a reliable base bean, a heavy body bean, or a bright high note, you’ll find options built for exactly this kind of experimentation. Browse the coffee and tea collection to pick up small quantities across multiple origins so you can start testing ratios without over-committing to any single bag. Zscoffee also stocks brewing accessories to support consistent home brewing, so your gear is never the weak link in your results.
FAQ
What is coffee blending?
Coffee blending is the process of combining two or more single-origin beans to create a cup with more balanced or complex flavor than any single bean can deliver on its own. Blends typically use a base bean, a body bean, and a high note bean in measured ratios.
What ratio should I start with when blending coffee?
A good starting point is 60% base bean, 30% body bean, and 10% high note bean. This ratio balances sweetness, body, and brightness, and you can adjust in 5% increments from there based on your taste preferences.
Should I grind beans separately or blend whole beans first?
Blend whole beans before grinding. Grinding mixed beans together produces a more consistent particle size and extraction compared to mixing pre-ground coffees, which can lead to uneven results in the cup.
What are the best origins for a beginner coffee blend?
Brazilian beans work well as a base, Indonesian origins like Sumatra add body, and Ethiopian beans contribute brightness. A simple 60% Brazilian, 25% Colombian, 15% Ethiopian blend is a well-tested starting point for most brewing methods.
How do I know when my blend needs adjusting?
Taste each component bean separately before blending, then compare your brewed blend against those individual notes. If the cup feels flat, increase your high note bean. If it tastes too sharp, reduce it. A blending journal makes these adjustments systematic rather than random.