TL;DR:
- Consistency in process and precise equipment are crucial for excellent home espresso results. Key tools include a digital scale, burr grinder, tamper, WDT tool, distribution tool, gooseneck kettle, and quality beans, with setup tailored to brewing style. Mastering a repeatable workflow and mindfulness transforms brewing into a satisfying ritual that enhances every cup.
You pull your first shot of the morning and something is off again. It runs too fast, tastes sour, or looks nothing like what you made yesterday with the exact same beans. Inconsistency is the most frustrating part of home espresso, and it usually comes down to process, not equipment. A clear, repeatable workflow solves most of those problems before they start. This guide walks you through every stage, from setting up your gear to recognizing when you have finally dialed things in perfectly.
Table of Contents
- Essential equipment for a smooth home barista workflow
- Step-by-step home barista workflow
- Troubleshooting: Solving common workflow problems
- Knowing when you nailed it: Key indicators of a dialed workflow
- A better home barista workflow: Why your ritual is your secret weapon
- Upgrade your home coffee setup with Z’s Coffee
- Frequently asked questions
Key Takeaways
| Point | Details |
|---|---|
| Preparation matters most | The right tools and a tidy setup are crucial for home barista success. |
| Repeatable routine yields consistency | A systematic brewing workflow helps you replicate great coffee every day. |
| Troubleshooting optimizes results | Quick fixes for channeling or flavor imbalances improve every cup. |
| Enjoy the ritual | Savoring your coffee-making process makes home brewing more rewarding. |
Essential equipment for a smooth home barista workflow
With the promise of a better cup established, let’s examine the gear you’ll need for a successful home barista setup.
You do not need a café’s full equipment list to brew exceptional coffee at home. What you do need is the right combination of tools that work together and support a repeatable process. Missing even one key item, like a scale or a proper grinder, can introduce variability that no amount of skill will fix.
Here are the core tools every home barista should have:
- Digital scale (0.1g precision): Measures dose and yield accurately for every brew
- Burr grinder: Produces uniform particle size, which is critical for even extraction
- Tamper: Compresses espresso grounds evenly into the portafilter basket
- WDT tool (Weiss Distribution Technique): Breaks up clumps before tamping to prevent channeling
- Distribution tool: Levels grounds across the basket surface evenly
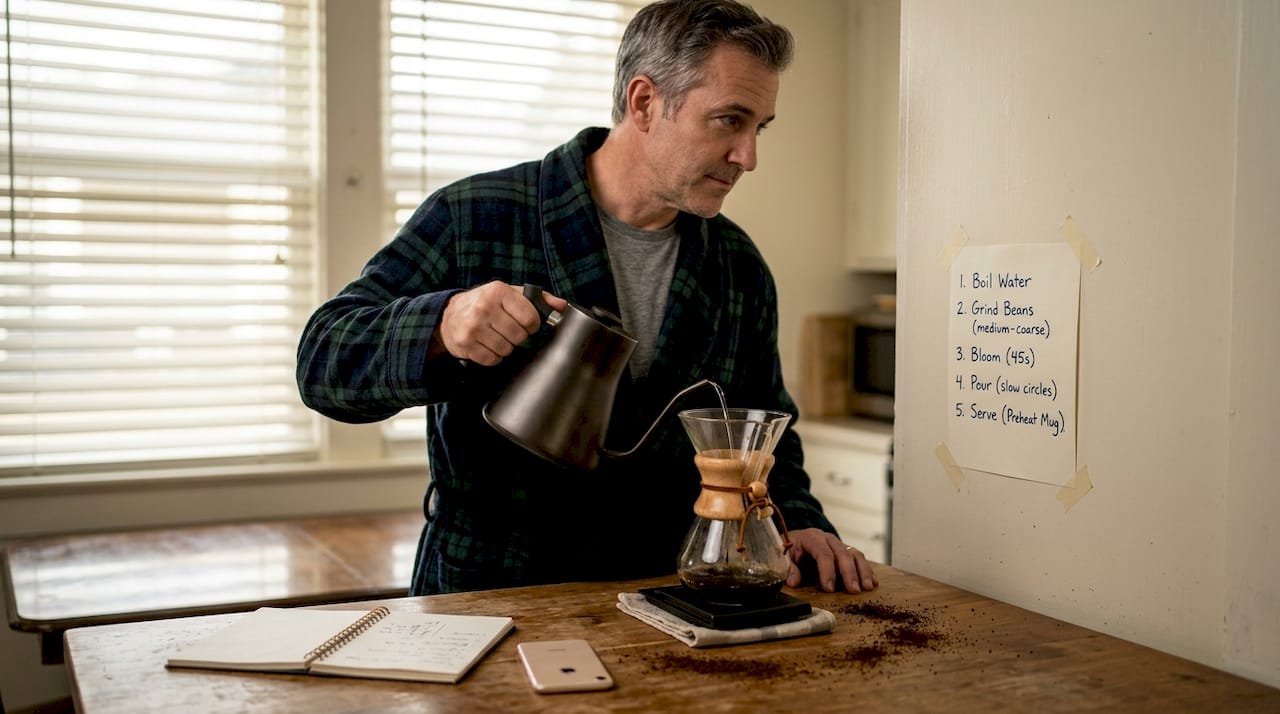
- Gooseneck kettle: Gives you precise pour control for manual brewing methods
- Brewer (espresso machine, pour-over dripper, or AeroPress): Your primary brewing device
- Fresh, quality beans: The single biggest flavor variable in your cup
- Filtered water: Eliminates mineral imbalance that distorts flavor
- Timer: Keeps your brew parameters consistent every single time
| Tool | Espresso | Pour-over |
|---|---|---|
| Digital scale | Essential (dose + yield) | Essential (dose + water) |
| Burr grinder | Critical (fine grind) | Critical (medium grind) |
| Tamper | Required | Not needed |
| WDT tool | Highly recommended | Optional |
| Gooseneck kettle | Helpful | Essential |
| Timer | Essential (shot time) | Essential (brew time) |
| Thermometer | Useful (boiler temp) | Useful (pour temp) |
As the home barista workflow emphasizes, home setups mirror café processes but prioritize ritual and confidence over speed. Tools like the WDT and distribution leveler are especially important for prosumer consistency because you are not pulling 200 shots a day to develop muscle memory.
Pro Tip: If you are choosing one upgrade to make first, buy a better grinder before anything else. Grind quality affects extraction more than your machine does, and the improvement will be immediately noticeable in both taste and consistency. Explore essential accessories to round out your setup thoughtfully, and browse home coffee bar ideas for inspiration on organizing your space.
Ritual and consistency beat speed every time. A home barista who follows the same methodical process each morning will produce far better coffee than someone rushing through steps with professional gear.
Step-by-step home barista workflow
Once you have your gear assembled, it’s time to put your setup to work with a concrete, repeatable workflow.
Espresso workflow
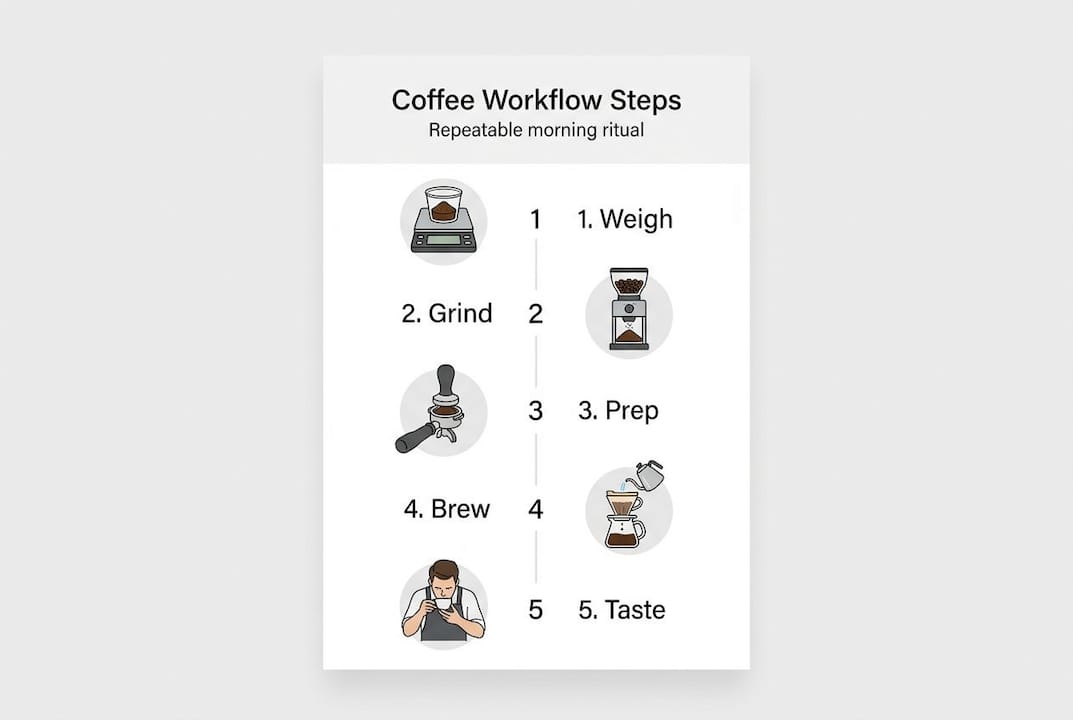
- Weigh your dose. Measure 18 grams of whole beans directly into the grinder hopper or a small cup. Precision here sets the foundation for everything else.
- Grind into the portafilter. Hold the portafilter under the grinder and grind directly in. Minimize transfer time to keep grounds fresh and clump-free.
- WDT and distribute. Use your WDT tool to stir the grounds in the basket, breaking up any clumps. Follow with your distribution tool to level the surface evenly.
- Tamp with consistent pressure. Press straight down with about 15 to 20 kilograms of pressure. Your wrist stays straight, the tamp stays level, and you avoid any post-tamp taps.
- Lock in and pre-infuse. Insert the portafilter and start a low-pressure pre-infusion of 5 to 10 seconds before full pressure engages. This saturates the puck evenly.
- Brew and weigh the yield. Place your scale and cup under the group head. Start the timer as extraction begins. You are targeting 36 grams out from 18 grams in, within 25 to 30 seconds.
- Stop the shot and taste. Stop extraction when you hit your target yield. Taste immediately and note the flavor profile for your log.
- Clean the portafilter. Knock out the puck, rinse the basket, and wipe the group head. A clean machine starts the next shot right.
Pour-over workflow
- Weigh and grind. Measure 25 grams of coffee and grind to a medium-coarse setting, similar to sea salt.
- Wet the filter. Place the paper filter in the dripper and rinse with hot water. This removes papery taste and preheats the brewer. Discard the rinse water.
- Add the grounds. Pour the ground coffee into the wet filter and give it a gentle shake to level the bed.
- Bloom pour. Add 50 grams of water at 93 to 96 degrees Celsius in a circular motion, covering all the grounds. Wait 30 to 45 seconds while CO2 releases and the grounds bloom.
- Main pour in stages. Pour in steady, concentric circles up to 400 grams total water, completing in two or three stages over about two minutes.
- Drawdown and serve. Let the water finish draining, which should happen naturally. Total brew time targets 2 minutes 30 seconds to 3 minutes 30 seconds.
- Clean up. Remove the filter with used grounds and rinse the dripper immediately. Coffee oils left behind will turn rancid.
The key difference between methods comes down to how water interacts with the coffee. Immersion methods like French Press keep grounds submerged throughout brewing for a fuller, oilier body, while percolation methods like pour-over produce a cleaner, brighter cup. AeroPress sits in an interesting middle ground, using both immersion and pressure for a concentrated result in just one to two minutes with a 1:16 ratio.
Pro Tip: When you are learning a new piece of equipment, run through the full workflow once using just water. This lets you focus on mechanics, timing, and muscle memory without the pressure of ruining good beans.
For a detailed breakdown of machine-specific techniques, the home espresso guide covers dialing in different machine types. You can also follow the step-by-step brewing walkthrough and use these espresso tips to sharpen your technique further.
Troubleshooting: Solving common workflow problems
Even with a solid workflow, you may occasionally face issues. Here’s how to fix the most common ones quickly.
Most problems with home espresso come down to three root causes: grind inconsistency, uneven distribution, and incorrect brewing parameters. Once you learn to read the symptoms, fixes become straightforward.
Taste-based corrections:
- Sour, sharp, or underwhelming flavor: Under-extraction. Grind finer and raise your brew temperature slightly.
- Bitter, harsh, or astringent flavor: Over-extraction. Grind coarser and lower your brew temperature.
- Weak, watery body: Increase your dose or tighten your grind slightly to slow the flow.
- Flat, hollow taste with no sweetness: Your beans may be stale. Fresh bean freshness matters enormously here.
Channeling fixes:
Channeling is when water finds a narrow path through the puck rather than flowing evenly through all the grounds. It produces a mix of under-extracted and over-extracted flavors simultaneously, often showing up as sourness with a bitter edge.
“Level tamp, no post-tamp tap, and WDT solve 90% of channeling at home.”
The WDT and even tamping are your first line of defense. Post-tamp taps, which many beginners instinctively do to settle grounds, actually crack the puck and invite channeling. Stop tapping.
Environmental and freshness variables:
Bean age and ambient humidity both shift your grind requirement. Re-dialing your grinder with every new bag is not optional if you want consistent results. Beans that are two weeks past roast behave differently from a freshly opened bag of the same variety. High humidity in summer causes grounds to clump more, requiring slightly coarser grinding or more aggressive WDT.
Pro Tip: Keep a small notebook or phone note with your grind setting, dose, yield, and brew time for every bag of beans you open. After three or four bags, you will start to see patterns that make dialing in much faster.
Preinfusion is worth mentioning here as a major consistency upgrade. By gently saturating the puck before full pressure engages, you reduce the chance of channeling significantly. Not all machines have a dedicated preinfusion setting, but many let you control pump pressure or use a manual technique. Understanding crema explained also gives you a visual feedback tool since crema quality directly reflects extraction consistency.
Knowing when you nailed it: Key indicators of a dialed workflow
After addressing issues, the next step is learning how to recognize real home barista success.
Success in home brewing is not just about hitting a number. It is a combination of sensory, visual, and timing cues that tell you the process is working together correctly.
Signs your workflow is dialed in:
- Taste: Sweetness comes through clearly, with balanced acidity and no harsh bitterness
- Aroma: The cup smells complex and inviting before you even take a sip
- Crema: Golden brown, thick, and persists on the surface for at least 30 seconds
- Extraction time: Espresso runs within the target 25 to 30 second window consistently
- Repeatability: You can pull two shots back to back with near-identical results
- Pour-over drawdown: The coffee bed drains evenly with no dry spots or water pooling
- Yield accuracy: Your actual output matches your target yield within one gram
| Symptom | Likely cause | Adjustment |
|---|---|---|
| Shot runs too fast | Grind too coarse or low dose | Grind finer or increase dose |
| Shot runs too slow | Grind too fine or high dose | Grind coarser or decrease dose |
| Sour taste | Under-extraction | Finer grind, higher temperature |
| Bitter taste | Over-extraction | Coarser grind, lower temperature |
| Weak body | Under-dosed or too coarse | Increase dose or grind finer |
| Uneven pour-over drawdown | Uneven grounds bed | Level grounds before blooming |
| No crema or thin crema | Stale beans or wrong grind | Use fresher beans, adjust grind |
Once your espresso benchmarks are consistently landing at 1:2 ratio in 25 to 30 seconds, you have built a reliable foundation. From there, you can experiment confidently by adjusting one variable at a time, whether that is origin, roast level, grind size, or water temperature. The full home brewing guide breaks down how to push further once you are stable.
A better home barista workflow: Why your ritual is your secret weapon
Most workflow guides are written with speed in mind. They optimize for throughput, minimize steps, and treat every second as a cost. That makes sense in a café pulling 400 shots a day. At home, it is entirely the wrong frame.
The home espresso experience is fundamentally different because ritual and confidence matter more than clock speed. When you move through your workflow with intention, weighing carefully, distributing thoughtfully, watching the extraction closely, you are not slowing down your morning. You are transforming it.
Here is the part most guides miss: the process of iterating and tuning your workflow is actually one of the most satisfying parts of home brewing. Dialing in a new bag of beans, finding the sweet spot for a new origin, pulling a shot that suddenly tastes exactly right after three attempts. That problem solving is not a flaw in the process. It is the process.
A consistent ritual also makes your improvements more meaningful. If you skip steps, rush the tamp, or eyeball your dose, you can never be sure what caused a great cup or a terrible one. When the workflow is stable, every adjustment teaches you something. You become a better brewer by actually understanding what you changed and why it worked.
Professional tools absolutely boost consistency, but they do not replace mindfulness. A $3,000 machine used carelessly will produce worse coffee than a modest setup run with focus and attention. What makes a skilled barista valuable is not just the equipment they use. It is how deliberately and consistently they interact with it.
Treat your home workflow as a practice, not a production line. The coffee you make for yourself deserves that kind of attention.
Upgrade your home coffee setup with Z’s Coffee
Ready to evolve your ritual? Here is how Z’s Coffee can help you make every cup more rewarding.
Building a consistent workflow is much easier when you have the right equipment supporting each step. At Z’s Coffee, you will find a carefully curated selection of brewing accessories, premium coffee beans, and everything else you need to close the gap between your current setup and the results you are chasing.

Whether you are looking for a precision tamper, high-quality fresh roasted beans sourced from standout origins, or specialty brewing gear to refine your pour-over technique, Z’s Coffee brings it all together in one place with global delivery. Browse the full store at zscoffee.shop and find the tools that match your workflow. Better gear does not replace good process, but it absolutely makes good process easier to repeat every single morning.
Frequently asked questions
What is the most important step in a home barista workflow?
Consistent weighing and grinding form the foundation for repeatable, excellent coffee at home. Without accurate measurement, every other step becomes guesswork.
How do I fix sour or bitter espresso at home?
For sour shots, grind finer and raise your brew temperature. For bitter shots, grind coarser and lower your temperature slightly.
How often do I need to adjust my grinder for best results?
Re-dial in your grind with every new bag of beans and whenever ambient humidity changes noticeably in your home.
What’s the difference between immersion and percolation methods?
Immersion brewing like French Press keeps grounds submerged for a fuller, oilier body, while percolation methods like pour-over produce a cleaner, brighter cup through continuous water flow.
How long should it take to pull a shot of espresso at home?
A well-dialed espresso shot should complete in 25 to 30 seconds with an 18 gram dose yielding approximately 36 grams in the cup.