TL;DR:
- Brewing outdoor coffee involves simple methods like pour-over, French press, or cowboy coffee, tailored to trip needs. It requires minimal gear, attention to water quality, grind size, and environment, with proper cleanup essential for preserving nature. Mastering these techniques ensures flavorful coffee and responsible backcountry stewardship.
Brewing coffee outdoors step by step is the process of making a genuinely great cup in nature using simple, repeatable techniques and minimal gear. The three most popular manual brewing methods for outdoor use are pour-over, French press, and cowboy coffee. Each produces a distinct result, requires different equipment, and suits different trip styles. Master any one of them and you will never settle for instant coffee at a campsite again.
What tools and ingredients you need to brew coffee outdoors
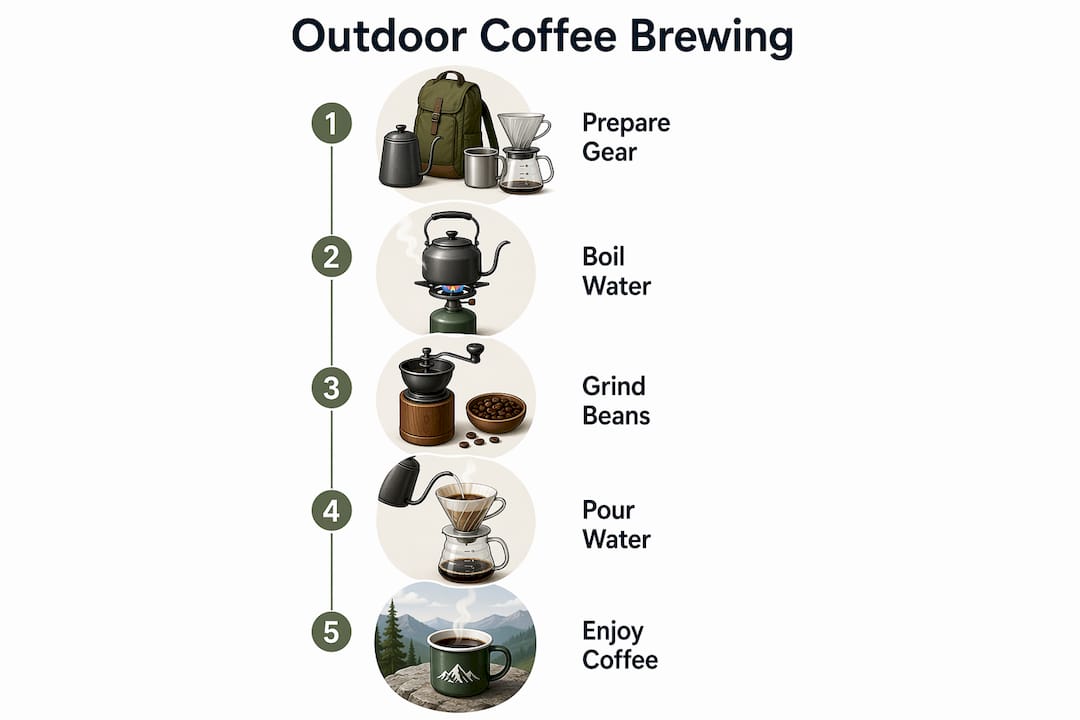
The right gear separates a frustrating outdoor brew from a satisfying one. Your core kit needs five things: a heat source, a vessel for boiling water, a brewer, a grinder, and quality coffee. A compact camp stove like a Jetboil or MSR PocketRocket handles the heat. A gooseneck kettle gives you the pour control that pour-over demands. A hand grinder like the Timemore Chestnut C2 or 1Zpresso JX adds almost no weight and makes a measurable difference in cup quality.
Water quality matters more outdoors than it does at home. Filtered water from a Sawyer Squeeze or a Katadyn BeFree produces a cleaner extraction than untreated stream water. Aim for water heated to just off boiling, around 195°F to 205°F at sea level. At altitude, the boiling point drops significantly. At approximately 10,000 feet elevation, water boils at about 194°F (90°C), which means you need to extend steep times by 30 to 60 seconds to compensate.
For portability, weight is a real constraint. Here is a comparison of the three main methods by gear requirements and pack weight:
| Method | Core gear needed | Approximate pack weight | Cleanup effort |
|---|---|---|---|
| Pour-over | Dripper, filters, gooseneck kettle, grinder | Medium | Moderate |
| French press | French press, grinder | Medium to heavy | Moderate |
| Cowboy coffee | Pot, grinder or pre-ground | Light | Easy |
Pre-ground coffee works in a pinch, but whole beans ground fresh on-site produce noticeably better flavor. A standard ratio of 1:15 coffee to water (15 g coffee to 225 g water) works well as a starting point for all three methods. Pack your essential brewing accessories in a dedicated stuff sack so nothing gets left behind at the trailhead.
How to brew coffee outdoors step by step with pour-over
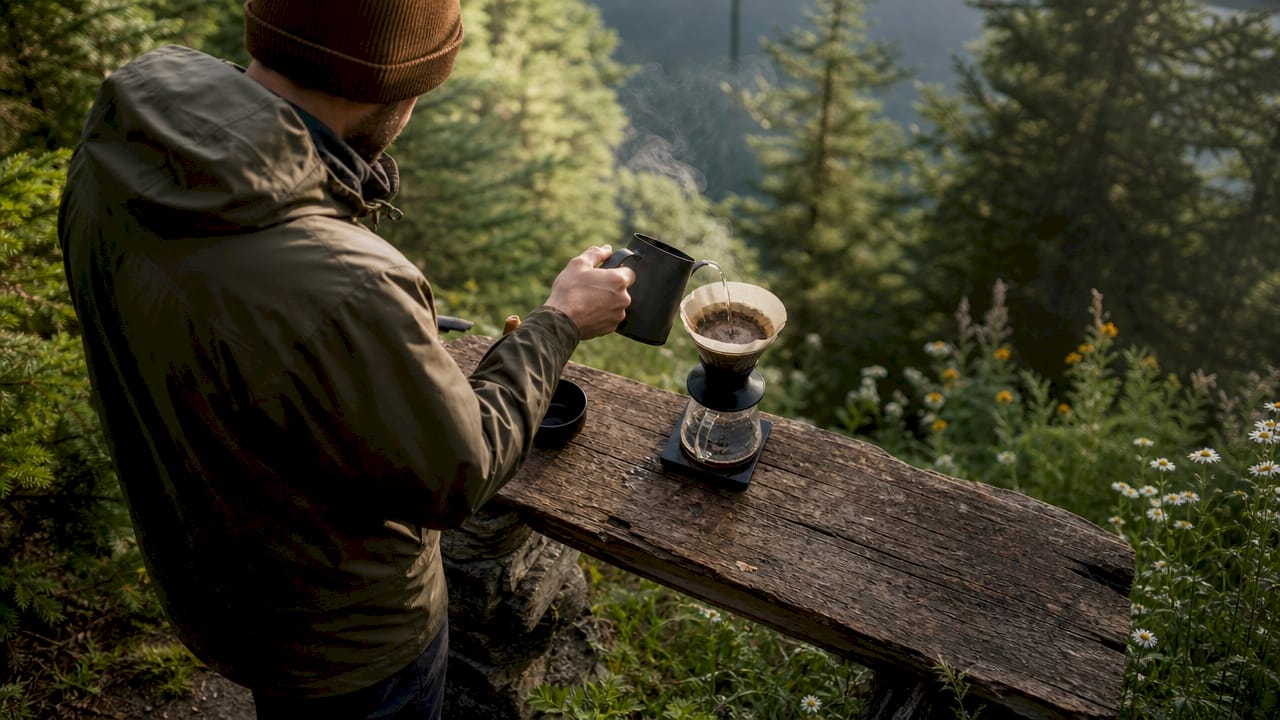
Pour-over is the most controlled outdoor brewing method and rewards careful technique with a clean, bright cup. The process takes about five minutes from boil to sip. Follow these steps precisely the first few times, then adjust to your taste.
- Boil your water. Heat water to a full boil, then let it sit for 30 to 45 seconds to drop to the ideal 195°F to 205°F range.
- Rinse the filter. Place your paper filter in the dripper (a Hario V60 or Kalita Wave both travel well) and pour a small amount of hot water through it. This removes paper taste and pre-warms the brewer.
- Add your grounds. Measure 15 g of medium-fine ground coffee into the filter and level the bed gently.
- Bloom the coffee. Pour 30 to 45 g of water (roughly 2 to 3 times the coffee weight) in slow circles over the grounds. The bloom phase releases trapped CO₂ from freshly roasted beans and allows even saturation. Wait 30 to 45 seconds. You will see the grounds swell and bubble. That is the CO₂ escaping, and skipping this step causes uneven extraction because the gas physically blocks water from reaching parts of the coffee bed.
- Main pour. Begin slow, circular pours from the center outward, keeping the water level steady. Avoid pouring directly on the filter walls. The total brew time should land between 2:30 and 4:00 minutes. If your drawdown is too fast and the coffee tastes thin, grind finer. If it is too slow and bitter, grind coarser.
- Drawdown and serve. Once all water has passed through the grounds, remove the dripper and pour into your mug immediately.
Pro Tip: Set up a small windscreen around your kettle using a folded piece of aluminum foil or a dedicated camp windshield. Wind drops kettle temperature fast, and consistent water temperature is the single biggest variable you can control outdoors.
Dry spots on the coffee bed are the most common pour-over mistake. They appear when you pour too fast or too far to one side. Slow, deliberate circles fix this every time.
How to brew coffee outdoors step by step with French press and cowboy coffee
These two methods are less gear-intensive than pour-over and better suited to group camping or minimalist trips where pack weight is the priority.
French press method
French press brewing uses a coarse grind steeped for four minutes, then pressed slowly and served immediately to avoid over-extraction. Here is the process:
- Pre-warm the French press by filling it with hot water for 60 seconds, then dump it out.
- Add coarsely ground coffee at a 1:15 ratio (15 g coffee per 225 g water).
- Heat water to just off boiling and wait 30 to 45 seconds before pouring.
- Pour water over the grounds, stir gently once, and place the lid on with the plunger pulled up.
- Steep for exactly four minutes.
- Press the plunger down slowly and steadily. Rushing the press forces fine particles through the mesh.
- Pour immediately into mugs. Coffee left sitting in the press continues extracting and turns bitter within minutes.
Pro Tip: Pre-warm your mug at the same time as the press. Cold mugs drop coffee temperature by 10°F to 15°F in the first 30 seconds. A travel mug with a handle solves this problem entirely and keeps your brew hot through a full morning hike.
Cowboy coffee method
Cowboy coffee is the most primitive and most forgiving method. It requires only a pot and fire. Add coarse grounds directly to near-boiling water, steep three to five minutes off heat, then settle the grounds before pouring.
- Bring water to a near boil, then pull the pot off the heat source.
- Add coarse grounds directly to the water (about 15 g per 225 g water).
- Stir once and let steep for three to five minutes.
- Tap the side of the pot gently to help grounds sink, or add a small splash of cold water to accelerate settling.
- Pour slowly and steadily into your mug, stopping before the last inch of liquid where most grounds collect.
The comparison below shows how French press and cowboy coffee differ in practice:
| Factor | French press | Cowboy coffee |
|---|---|---|
| Grind size | Coarse | Coarse |
| Steep time | 4 minutes | 3 to 5 minutes |
| Gear required | Press, grinder | Pot only |
| Grit in cup | Minimal | Possible |
| Cleanup | Moderate | Simple |
Outdoor coffee brewing troubleshooting and common mistakes to avoid
Most outdoor coffee problems trace back to three variables: grind size, water temperature, and wind. Fix those three and you fix 90% of bad cups.
- Bitter coffee: Grind coarser first. Grind size is the primary control over extraction speed outdoors, more effective than adjusting ratios or timing. A coarser grind slows extraction and reduces bitterness immediately.
- Weak or watery coffee: Grind finer, or extend your steep time by 30 seconds. At high altitude, always add 30 to 60 extra seconds to any steep-based method.
- Uneven extraction in pour-over: You likely skipped or rushed the bloom. The CO₂ trapped in fresh grounds creates a barrier that prevents even water contact. A proper 30 to 45 second bloom solves this.
- Grit in cowboy coffee: You poured too fast or too soon. Give grounds a full two minutes to settle after steeping. Tapping the pot helps. Pouring through a bandana or cloth as a makeshift filter also works.
- Temperature dropping too fast: Wind is the main culprit. A windscreen around your stove and an insulated mug solve most heat-loss problems in cold or breezy conditions.
Pro Tip: Bring a small digital scale and a pre-measured scoop. Consistency in outdoor brewing comes from stabilizing your measurements, shielding from wind, and repeating the same process each time. Eyeballing ratios produces wildly different results across trips.
How to clean up and follow Leave No Trace principles after brewing
Cleaning up coffee gear outdoors requires more care than rinsing at a kitchen sink. Coffee oils and grounds attract wildlife and leave odors that linger at campsites.
- Dry-scrape all grounds first. Use a spoon or your finger to remove as much solid material as possible from your French press, dripper, or pot before adding any water. Wiping solids before rinsing dramatically reduces the odor that attracts animals.
- Pack out all grounds and filters. Seal used grounds and paper filters in a zip-lock bag and carry them out with your trash. Do not bury grounds. They decompose slowly and attract bears and rodents.
- Use minimal soap. A tiny drop of biodegradable soap like Dr. Bronner’s is enough. Excess soap residue affects your next brew and harms aquatic life if it reaches water.
- Dispose of graywater correctly. Graywater disposal requires scattering rinse water at least 200 feet from any natural water source, trail, or campsite. This prevents contamination and odor buildup.
- Dry your gear before packing. Damp French press mesh and wet filters develop mildew quickly in a pack. A quick air-dry or wipe with a clean cloth prevents this.
“Leave the campsite cleaner than you found it” is not just a courtesy. It is the standard that keeps backcountry areas open to everyone.
Good stewardship and great coffee are not in conflict. A five-minute cleanup routine protects the places you love to brew in.
Key takeaways
Brewing great coffee outdoors requires the right method, consistent measurements, and a five-minute cleanup routine that respects the environment.
| Point | Details |
|---|---|
| Choose the right method | Pour-over suits precision drinkers; French press suits groups; cowboy coffee suits minimalists. |
| Bloom every pour-over | Pour 2 to 3 times the coffee weight in water and wait 30 to 45 seconds before the main pour. |
| Fix problems with grind size | Bitter coffee needs a coarser grind; weak coffee needs a finer grind. Adjust this before anything else. |
| Account for altitude | At 10,000 feet, water boils at 194°F. Add 30 to 60 seconds to steep times to compensate. |
| Pack out everything | Seal grounds and filters in a zip-lock, scatter graywater 200 feet from water sources, and dry gear before storing. |
What I have learned from years of brewing coffee at camp
The most common mistake I see outdoor coffee drinkers make is trying to replicate their home setup exactly. You will not have a PID-controlled kettle or a Baratza Encore at the trailhead, and that is fine. The outdoor context rewards simplicity and adaptability, not perfection.
My personal setup for most trips is a Hario V60 01, a Timemore hand grinder, and a 600 ml titanium kettle. That combination weighs under 400 g total and produces a cup I would be happy to serve at home. The key shift that improved my camp coffee most was building a dedicated “coffee station” at camp: one flat rock or small cutting board, gear laid out in order of use, water already heated. That five-minute setup eliminates fumbling and cold water mistakes before the first pour.
The other thing I will tell you honestly: cowboy coffee gets a bad reputation it does not deserve. When you use freshly ground beans, good water, and let the grounds settle properly, it produces a rich, full-bodied cup that French press drinkers would respect. Do not write it off because of bad campfire coffee you had as a kid.
Embrace the trial and error. Your third outdoor brew will be dramatically better than your first. The process itself, fire, water, patience, is part of what makes camp coffee worth the effort.
— zachary
Gear up for your next outdoor brew with Zscoffee

Zscoffee stocks everything you need to take your camp coffee from acceptable to genuinely great. If you want a no-fuss option for early mornings on the trail, the Zscoffee cold brew is ready to drink straight from the bottle. No heat source, no grinder, no cleanup. For those who want to brew hot in the field, the Zscoffee travel mug keeps your pour-over or French press hot for hours. Browse the full coffee and accessories collection to find beans, gear, and everything else your outdoor coffee kit is missing.
FAQ
What is the easiest method to brew coffee outdoors?
Cowboy coffee is the simplest outdoor method. It requires only a pot, coarse grounds, and hot water, with no additional equipment or filters needed.
How long does pour-over coffee take to brew outdoors?
A pour-over brew takes between 2:30 and 4:00 minutes from first pour to drawdown. The bloom phase adds another 30 to 45 seconds before the main pour begins.
Why does my outdoor coffee taste bitter?
Bitter coffee outdoors almost always means over-extraction. Grind coarser first before adjusting any other variable, since grind size is the fastest and most effective fix.
How do I dispose of coffee grounds when camping?
Pack used grounds and filters in a sealed zip-lock bag and carry them out. Never bury grounds, and scatter any rinse water at least 200 feet from natural water sources and campsites.
Does altitude affect how I brew coffee outside?
Yes. At 10,000 feet, water boils at approximately 194°F instead of 212°F. Extend steep times by 30 to 60 seconds at high elevation to achieve proper extraction.