TL;DR:
- Home roasting allows for greater control over flavor by preventing the freshness loss common in store-bought coffee.
- Using simple equipment like a skillet or popcorn popper, beginners can achieve consistent, flavorful roasts with practice.
Store-bought coffee is a compromise. The beans sitting on that grocery shelf were roasted weeks, sometimes months ago, and flavor starts fading within days of roasting. If your morning cup tastes flat, bitter, or just uninspired, the beans are almost certainly the culprit. Roasting your own coffee at home puts you in control of every variable, from the origin of the green bean to the precise roast level in your cup. This guide walks you through every stage of the process, from gear and bean selection to troubleshooting and tasting, so you can start pulling richer, more complex coffee at home.
Table of Contents
- Gather your tools and green coffee beans
- Step-by-step home coffee roasting process
- Troubleshooting and avoiding common mistakes
- Maximize coffee flavor: From roasting to brewing
- Why mastering home roasting beats any store-bought coffee
- Elevate your home coffee routine with fresh beans and accessories
- Frequently asked questions
Key Takeaways
| Point | Details |
|---|---|
| Home roasting essentials | Start with the right tools and quality green beans for the best results. |
| Master the process | Follow each step closely and listen for ‘cracks’ to guide roast progress. |
| Avoid common pitfalls | Watch for uneven roasting or scorching and address quickly to maintain flavor. |
| Link roast to flavor | Experiment with different roast levels and brewing methods to find your favorite cup. |
| Experiment and enjoy | Personalized home roasting creates flavors you can’t find in store-bought coffee. |
Gather your tools and green coffee beans
Once you know why roasting at home matters, you’ll need the right tools and ingredients before diving in. Walking into a roast session unprepared is the fastest way to waste good beans and get discouraged.
Essential equipment
You don’t need an expensive professional setup to get started. Many home roasters begin with tools they already own, then upgrade as their skills grow. Here’s what you’ll actually need:
- A heat source and roasting vessel: Options range from a simple cast iron skillet on a stovetop to a dedicated air roaster or drum roaster. Each has different strengths (covered below).
- A thermometer: A probe or infrared thermometer helps you track bean surface temperature, which is critical for hitting your target roast level.
- A cooling tray or colander: Beans must cool rapidly after roasting to stop them from continuing to develop. A metal colander works well for small batches.
- A timer: Even a phone timer works. Consistency in timing is one of the simplest ways to replicate a great roast.
- A scale: Weigh your green beans before roasting. Beans lose 15 to 20 percent of their weight in moisture during roasting, so knowing your start weight helps you calibrate.
- Ventilation: Roasting produces chaff (thin papery skin from the beans) and smoke. A kitchen exhaust fan or open window is essential.
For a deeper look at which coffee accessories essentials are worth owning at each stage of your coffee journey, it’s worth building your toolkit intentionally.
Choosing your green coffee beans
Green beans are simply unroasted coffee. They’re shelf stable for up to a year when stored correctly, which makes buying in small test batches a smart strategy. Specialty-grade beans (scored 80 or above on a 100-point scale by a licensed Q Grader) offer the most nuanced flavor potential.
| Equipment type | Best for | Approximate cost |
|---|---|---|
| Stovetop skillet or wok | Beginners, budget roasting | $0 to $30 |
| Air popcorn popper | Small batches, fast feedback | $15 to $40 |
| Dedicated air roaster | Consistent, controllable roasts | $100 to $400 |
| Drum roaster | Large batches, even development | $300 to $1,000+ |
| Bean origin | Flavor profile | Roast level suitability |
|---|---|---|
| Ethiopia (Yirgacheffe) | Floral, citrus, berry | Light to medium |
| Colombia | Caramel, red fruit, mild acidity | Medium |
| Sumatra | Earthy, dark chocolate, low acidity | Medium to dark |
| Brazil | Nutty, chocolate, low acidity | Medium to dark |
When choosing coffee beans for your first home roast, opt for a washed Ethiopian or Colombian bean. These origins tend to be forgiving and reward both light and medium roasts with clear, enjoyable flavors.
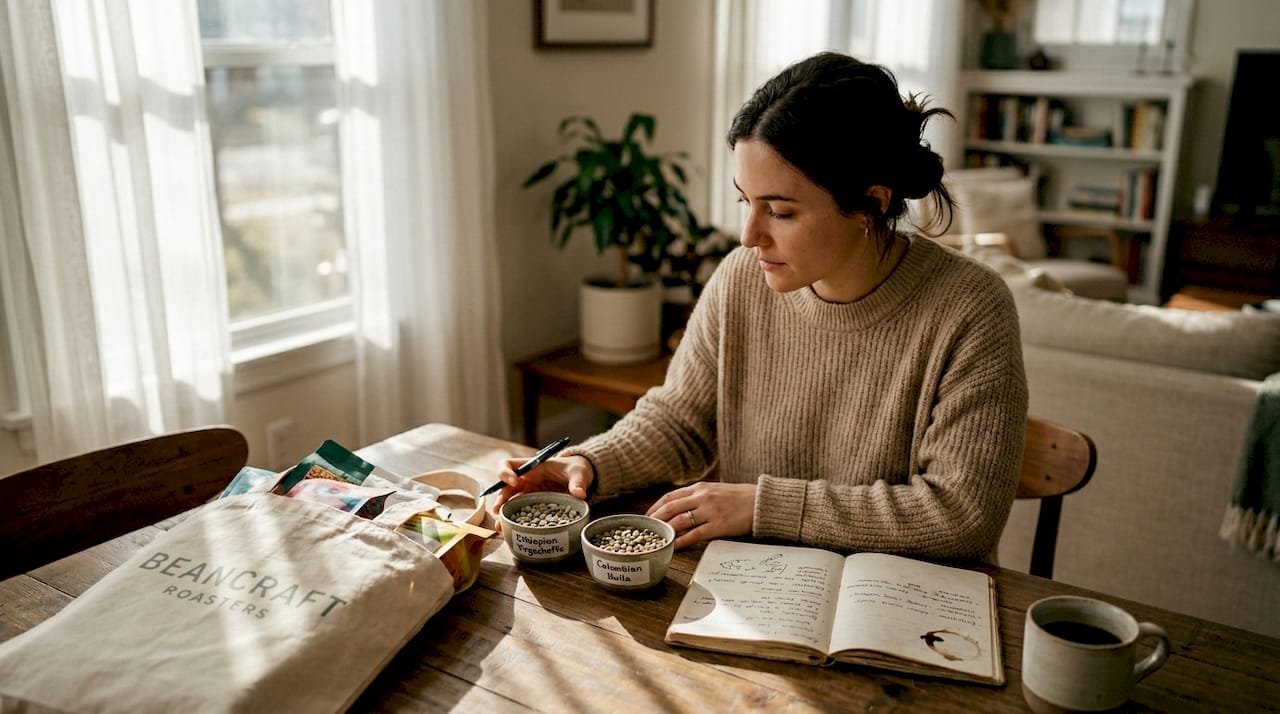
Pro Tip: Source your green beans from specialty importers that publish harvest dates and processing information. Freshly harvested green beans (within 12 months of processing) produce more vibrant flavors than old crop beans that have been sitting in a warehouse.
Step-by-step home coffee roasting process
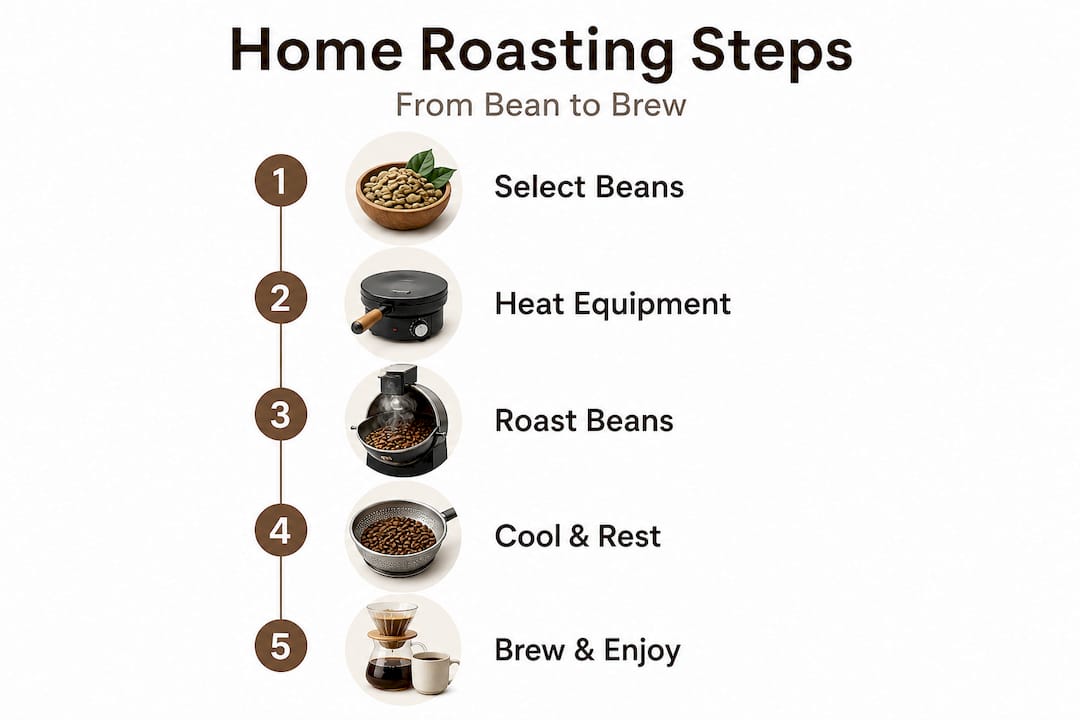
With the right tools in hand, you’re ready to start roasting. Here’s a clear sequence to follow for best results. The goal is to apply heat evenly and consistently, paying close attention to the sensory cues your beans give you along the way.
The roasting sequence
- Measure your green beans. Start with 100 to 150 grams for your first batch. Smaller batches are easier to control and give you faster feedback on your technique.
- Pre-heat your roaster. If you’re using a skillet or wok, bring it to around 400°F (204°C) before adding beans. Air roasters and drum roasters typically have a built-in pre-heat stage.
- Add beans and begin agitation. Constant stirring or turning is essential for even roasting. Beans that sit still will scorch on one side and stay underdeveloped on the other.
- Watch for the drying phase. In the first 3 to 5 minutes, beans turn from green to yellow and smell grassy or hay-like. This is the moisture evaporating.
- Listen for first crack. Around 370 to 400°F (188 to 204°C), you’ll hear a series of sharp popping sounds, similar to popcorn. This marks the start of a light roast. Most home roasters aim to finish somewhere between first crack and second crack.
- Monitor color and aroma. As you push past first crack, beans deepen from light brown to medium and eventually dark brown. The aroma shifts from toasty bread to chocolate, then to smoky or bitter notes.
- Listen for second crack (optional). A second, softer crackling sound signals a dark roast. Oils begin surfacing on the bean. Many specialty roasters stop before this point.
- Cool the beans immediately. Transfer beans to your colander and stir vigorously, or use a fan to drop the temperature fast. The goal is to stop roasting development within 2 to 3 minutes of removal from heat.
- Vent and store. Let beans off-gas in a paper bag or an open container for 12 to 24 hours before sealing in an airtight jar.
For those who want to connect roasting skill to brewing skill, exploring a solid step-by-step brewing process helps you understand how roast development directly shapes what ends up in your cup.
Roasting method comparison
| Method | Heat control | Batch size | Learning curve | Pros |
|---|---|---|---|---|
| Stovetop skillet | Moderate | Small | Medium | No extra equipment |
| Air popcorn popper | Low | Very small | Low | Fast, visible beans |
| Dedicated air roaster | High | Small to medium | Low | Consistent, built-in timer |
| Drum roaster | Very high | Medium to large | High | Most even, professional results |
Pro Tip: Mastering the gap between first and second crack is where most of the flavor action happens. A light roast finished right at or just after first crack preserves the bean’s origin character, floral notes, and bright acidity. A medium roast, pulled 1 to 2 minutes after first crack, develops balance and sweetness. Learn to identify first crack clearly before attempting darker profiles.
Troubleshooting and avoiding common mistakes
Even with a step-by-step process, challenges can arise. Knowing the most common errors helps you roast with confidence rather than frustration.
Common roasting errors and fixes
- Uneven roast (mixed colors in the batch): Usually caused by insufficient agitation or too large a batch for the vessel. Stir more frequently and reduce your batch size by 20 to 30 percent.
- Scorching (dark spots on beans while most are underdeveloped): Heat is too high at the start. Lower your starting temperature and build heat gradually. Scorching introduces harsh, ashy flavors that can’t be fixed in the brew.
- Stalling (beans stuck in yellow or tan stage): Heat is too low. This is called a “baked” roast, and it produces flat, bread-like flavors with no brightness. Increase your heat source and move faster through the early drying phase.
- Under-development (thin, sour, grassy taste): You pulled the roast too early, before first crack completed. Push the roast a little further and let the first crack run fully before considering removal.
- Over-roasting (bitter, smoky, hollow taste): You pushed past the ideal exit point. Work on shortening your time between second crack and removal, or aim for an earlier target level.
Warning: Never leave a roast unattended. Dry heat, chaff, and bean oils create real fire risk if you step away. Keep a fire extinguisher nearby when roasting on a stovetop. Always roast in a well-ventilated space to prevent smoke inhalation and triggered smoke detectors.
Keep a roast log
One of the single most effective habits a home roaster can build is logging every session. Write down your bean origin, start weight, roasting method, time to first crack, total roast time, and your flavor notes after brewing. Over several roasts, patterns emerge. You’ll identify which variables produce your best cups and where you consistently lose control. A simple notebook works perfectly for this. The goal is not perfection on the first try but measurable improvement over time.
Reviewing coffee brewing mistakes that happen after roasting is equally important, because even a well-roasted bean can disappoint in the cup if brew technique is off.
Maximize coffee flavor: From roasting to brewing
After troubleshooting and refining your roast, the real payoff comes when you brew and taste truly vibrant coffee. Home roasting only delivers its full potential when you connect the roasting process to smart grinding, resting, and extraction decisions.
How roast level affects brewing
A light roast is dense, retains more moisture, and requires more contact time or finer grinding to extract fully. A dark roast is porous and extracts much faster. Using a light roast grind setting on a dark roast will produce over-extracted, bitter coffee. Adjust your grind coarser as roast level increases, and shorten your brew time slightly.
Flavor-enhancing practices
- Rest your beans after roasting. Freshly roasted coffee releases CO2 rapidly, a process called degassing. Brewing too soon produces a carbonate, uneven extraction. Rest beans 12 to 24 hours for espresso. For pour-over or French press, a 24 to 48 hour rest often produces the best results.
- Grind fresh, every time. Pre-ground coffee stales within minutes. A quality burr grinder (not a blade grinder, which creates uneven particles) is the single biggest upgrade you can make to your brewing setup.
- Use filtered water. Mineral-heavy tap water can suppress delicate flavors in light roasts. Aim for water with a total dissolved solids (TDS) level between 75 and 150 parts per million.
- Match your brew method to your roast. Light roasts shine in pour-over and drip methods where their acidity and floral notes have room to express. Dark roasts often work better in espresso or French press where bold, heavy body is an asset.
- Store beans correctly. Use an airtight, opaque container at room temperature. Avoid the refrigerator, where condensation causes flavor loss.
For a richer understanding of enhancing coffee flavor through brewing decisions, or to go deeper into coffee extraction guide principles, both topics directly reward home roasters who want complete control over flavor.
Pro Tip: Use cupping to evaluate your roasts objectively. Cupping is a standardized tasting method where you steep coarsely ground coffee in hot water for 4 minutes, then skim the crust and taste with a spoon. It strips away brewing variables so you’re tasting the roast itself. Once you can identify specific flavor notes in a cupping, you’ll roast with far more intentionality. You can sharpen this skill further with structured coffee tasting tips that train your palate over time.
Why mastering home roasting beats any store-bought coffee
With the full process and tips in hand, it helps to step back and see why this journey matters beyond the technical steps.
Here’s an opinion that most coffee content won’t say plainly: store-bought coffee, even good store-bought coffee, is optimized for shelf life, not flavor. Roasters packaging for retail have to balance roast profiles that taste acceptable two months after production. That means most commercial roasts are slightly darker and more developed than they need to be, because darker roasts stale more slowly and taste more consistent over time on a shelf.
When you roast at home, you’re working in the opposite direction. You’re roasting for a brew window of 4 to 14 days, which means you can afford to roast lighter, hit more nuanced flavor development, and taste characteristics in your cup that commercial coffee simply can’t deliver at scale.
The other myth worth addressing is that home roasting is complicated, unpredictable, or risky. It does have a learning curve. Your first three or four roasts may be uneven. Your timing will improve. Your ability to read color and sound will sharpen faster than you expect. Most people who commit to five or six roasting sessions report that the process becomes intuitive rather than stressful.
Exploring types of coffee beans from different origins is where home roasting gets genuinely exciting. You’ll discover that the same roasting technique applied to an Ethiopian natural process and a washed Guatemalan produces two completely different sensory experiences. That kind of personalized discovery is something no grocery shelf can offer you.
The emotional satisfaction is real too. There’s something grounding about holding a cup of coffee that you sourced, roasted, ground, and brewed yourself. It’s a process that reconnects you with where coffee actually comes from.
Elevate your home coffee routine with fresh beans and accessories
Once you’ve discovered the joys of home roasting, having the right resources on hand will fuel your new passion.

At Z’s Coffee, we make it easy to find everything you need in one place. Whether you’re stocking up on quality fresh beans sourced from top-tier origins or looking for the accessories that make the roasting and brewing experience more enjoyable, our catalog is built for coffee lovers who take their cup seriously. And once your home-roasted beans are ready, there’s nothing quite like taking that perfect cup on the road in a quality travel mug for home-roasted coffee that keeps every sip at the right temperature. Explore the full collection and let your home roasting journey grow.
Frequently asked questions
How long does it take to roast coffee at home?
Home roasting usually takes 10 to 20 minutes, depending on your method and your target roast level. Air poppers and stovetop methods tend to roast faster than drum roasters, which develop beans more slowly and evenly.
How should I store freshly roasted coffee beans?
Keep roasted beans in an airtight, opaque container at room temperature, away from light, heat, and moisture. Avoid the refrigerator or freezer for daily-use beans, as repeated temperature changes introduce moisture and degrade flavor.
How soon can I brew coffee after roasting beans?
Rest your roasted beans for at least 12 to 24 hours before brewing to allow CO2 to off-gas and flavors to settle. For espresso, a rest of 3 to 5 days often produces the most balanced extraction.
What are the signs of a correctly roasted coffee bean?
Properly roasted beans have an even, consistent color throughout the batch, no surface oil visible on lighter roasts, and a fragrant, toasty aroma rather than a scorched or green grassy smell.