TL;DR:
- Espresso results at home vary due to multiple interacting variables, requiring systematic control for consistency. Essential tools include a stable espresso machine, a quality burr grinder, a precision scale, and proper water quality; mastering these ensures better extraction. Adjusting grind size, temperature, and dose step-by-step based on taste and timing leads to tailored, reliable shots rather than relying on fixed recipes.
You’ve followed the recipe exactly, weighed your dose, and pulled the shot, yet the result tastes nothing like what you get at your favorite café. That frustration is almost universal among home baristas, and it has a specific cause: espresso is not a single recipe but a living system of interacting variables. Grind size, water temperature, dose, yield, and prep technique all push and pull against each other. Master the process of controlling those variables one at a time, and consistency stops being a lucky accident and starts being your normal.
Table of Contents
- Essential tools and setup for home espresso
- Dialing in: The step-by-step espresso workflow
- Troubleshooting: Common mistakes and how to fix them
- Adapting to beans and roast: Customizing for best flavor
- The truth most guides miss: Why process is king, not recipe
- Upgrade your home espresso experience with Z’s Coffee
- Frequently asked questions
Key Takeaways
| Point | Details |
|---|---|
| Process beats recipe | Changing only one variable at a time delivers consistent espresso results. |
| Measurement matters | Weighing inputs and outputs in grams is essential for repeatable quality. |
| Troubleshoot common errors | Most mistakes trace back to prep inconsistency or measurement. |
| Customize for your beans | Adjust ratio and temperature for roast and freshness to unlock best flavor. |
| Upgrade for better results | Premium gear and fresh beans support professional-quality espresso at home. |
Essential tools and setup for home espresso
Now that you’ve seen why consistency usually eludes home baristas, let’s start with the foundation: the right tools and setup.
Before you touch a single gram of coffee, your equipment needs to be in order. Trying to dial in espresso on a poorly maintained machine with a blade grinder is like trying to bake a perfect croissant in a toaster oven. The tools shape the outcome before you even start brewing.
Here are the core items every home barista needs:
- Espresso machine with stable temperature control (thermoblock or dual boiler preferred)
- Burr grinder capable of fine, stepless or micro-stepped adjustment
- Precision scale that reads to 0.1 grams
- Tamper that fits your portafilter basket snugly (usually 58 mm)
- Distribution tool or WDT tool (Weiss Distribution Technique) to break up clumps before tamping
- Espresso cups or shot glasses with a spout for accurate yield measurement
The home barista workflow lives or dies by the grinder and the scale. A quality burr grinder produces uniform particle sizes, which means water flows through the puck evenly. A scale eliminates guesswork entirely. As established guides converge on, espresso is multi-variable, covering grind, temperature, dose and yield, prep uniformity, and machine factors, and the only reliable approach is a repeatable process where you change one variable at a time rather than relying on a static recipe.
| Tool | Must-have | Nice-to-have upgrade |
|---|---|---|
| Burr grinder | Entry-level flat or conical burr | Single-dose grinder with low retention |
| Scale | 0.1 g resolution, timer included | Bluetooth espresso scale with flow rate |
| Tamper | Basic 58 mm stainless | Calibrated self-leveling tamper |
| Distribution tool | Cheap WDT needle tool | Precision OCD-style leveler |
| Machine | Single boiler with PID | Dual boiler with pressure profiling |
| Water | Filtered tap water | Third-wave water mineral packets |
Pro Tip: Water quality is often the most overlooked variable. Hard or heavily chlorinated water dulls flavor and builds scale inside your machine fast. Use filtered water and descale your machine every one to three months depending on your local water hardness. A clean boiler maintains temperature accuracy, which is non-negotiable for repeatable shots.
Check out these espresso pro tips for a deeper look at machine maintenance and setup best practices that protect your investment long term.
Dialing in: The step-by-step espresso workflow
With your setup dialed, it’s time to move through the workflow that produces repeatable, professional-quality results.
Dialing in is the process of adjusting variables until your espresso hits the target flavor profile consistently. The key word is systematically. A practical home-espresso workflow treats shot time, extraction character, and strength as functions of grind size, temperature, and dose/yield in a specific sequence: change one variable at a time, starting with grind size, then temperature, then dose and yield. Jumping between variables at random is the number one reason home baristas spin their wheels for weeks without improvement.
Follow this numbered sequence every time you dial in a new bag of beans:
- Set your dose. Start with 18 grams of ground coffee in a standard 58 mm double basket. Keep this fixed until you’ve nailed grind size.
- Set your target yield. Aim for 36 grams of liquid espresso out, which is a classic 1:2 brew ratio measured by weight. This is the standard specialty starting point, with an extraction window of roughly 25 to 30 seconds.
- Adjust grind size first. Pull a shot and time it from the moment you start the pump. If it runs faster than 25 seconds, grind finer. Slower than 30 seconds, go coarser. Move in small increments.
- Taste and evaluate. Sour or thin means under-extracted. Bitter or harsh means over-extracted. Let flavor guide you, not just time.
- Adjust temperature second. Once grind size is in the ballpark, small temperature changes (plus or minus 1 to 2°C) fine-tune extraction without blowing up your time window.
- Adjust dose or yield last. Changing dose or yield shifts strength and body. Increase yield for a lighter, longer shot; decrease for a denser, more intense one.
| Step | Variable | Action if too fast (under 25 sec) | Action if too slow (over 30 sec) |
|---|---|---|---|
| 1 | Grind size | Grind finer | Grind coarser |
| 2 | Temperature | Increase by 1°C | Decrease by 1°C |
| 3 | Dose | Increase by 0.5 g | Decrease by 0.5 g |
| 4 | Yield | Reduce output weight | Increase output weight |
Always weigh your yield in grams, not milliliters. Crema adds volume without adding coffee solids, so a volumetric reading will always mislead you. Grams are honest.
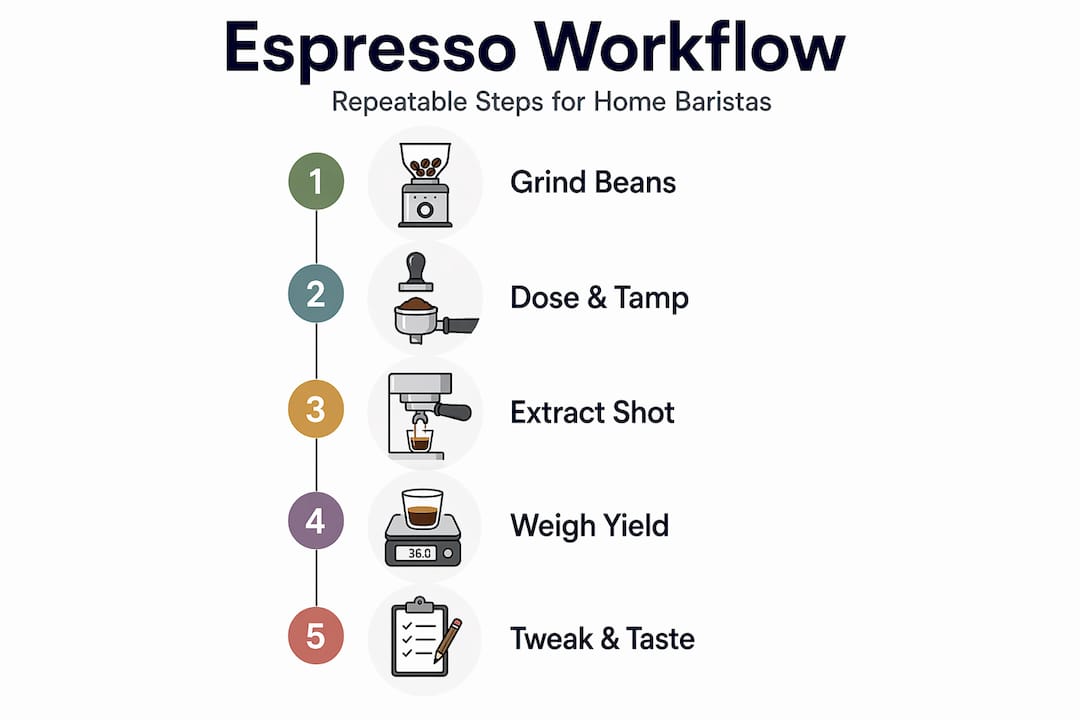
Pro Tip: Keep a simple shot log, even just a notes app on your phone. Record grind setting, dose, yield, time, and a one-line tasting note for each pull. After three or four sessions, patterns emerge that would otherwise be invisible. You’ll stop guessing and start diagnosing.
For a complete deep dive into extraction science, the brewing guide walks through every variable with practical examples. And if you want to understand what’s happening inside the puck during extraction, coffee extraction tips explain the chemistry in plain language.
Troubleshooting: Common mistakes and how to fix them
Even the right workflow can hit snags. Let’s break down what goes wrong and how to make fixes on the fly.
Most home espresso problems fall into three categories: measurement errors, prep inconsistencies, and recipe confusion. Knowing which category your problem belongs to cuts troubleshooting time dramatically.
Measurement errors are the most common and the easiest to fix. Incorrect measurement method, specifically using volume instead of weight due to crema, is one of the top edge cases that breaks an otherwise solid dialing process. If you’re measuring your yield in a shot glass and eyeballing the level, you could be off by 5 to 10 grams without realizing it. That’s the difference between a balanced shot and something undrinkable. Put a scale under your cup. Every single time.
Prep inconsistencies are sneakier because they’re invisible until you know what to look for:
- Uneven coffee distribution in the basket before tamping creates weak spots where water rushes through, a problem called channeling
- Inconsistent tamp pressure or an angled tamp causes the same issue from a different direction
- Grinding directly into the portafilter without distributing first almost guarantees uneven density
- Wet or oily beans can clump and block even distribution
Critical diagnostic warning: If your shot time is wildly inconsistent from pull to pull even when nothing has changed, channeling is almost certainly the cause. A single channel can drop your shot time by 10 or more seconds and completely hollow out the flavor. Fix your prep before you touch any other variable.
Recipe confusion is the third trap. Extraction time targets are diagnostic tools, not rigid rules. A 28-second shot that tastes great is correct. A 27-second shot that tastes sour is not. Use time as a starting reference and flavor as the final judge.
Here’s a quick reference for common symptoms and their most likely causes:
- Shot runs in under 20 seconds: Grind too coarse, channeling, or dose too low
- Shot runs over 35 seconds: Grind too fine, tamp too hard, or dose too high
- Sour and thin flavor: Under-extraction, often grind too coarse or temperature too low
- Bitter and harsh flavor: Over-extraction, often grind too fine or temperature too high
- Inconsistent shot times pull to pull: Channeling from poor prep
For a broader look at what goes wrong across all brewing methods, coffee brewing mistakes covers the most frequent errors home brewers make and exactly how to correct them. And if you want a structured daily routine that prevents most of these issues before they start, step-by-step home brewing lays out a complete morning workflow.
Adapting to beans and roast: Customizing for best flavor
Once you’re making repeatable espresso, customizing to your beans and roast profile unlocks the next level of flavor.
Not all beans behave the same way in your machine, and roast level is the biggest reason why. Lighter roasts require higher temperature and often longer yields to avoid sour under-extraction, while dark roasts over-extract faster and typically benefit from shorter ratios and lower temperatures. This means the 1:2 ratio at 93°C that works beautifully for a medium Ethiopian might produce a hollow, sour shot from a light Kenyan and a bitter, ashy mess from a dark Italian blend.
Here’s how to read your beans and adjust accordingly:
-
Light roast symptoms and fixes:
- Tastes sour or grassy: Raise temperature by 1 to 2°C, or extend yield slightly to a 1:2.5 ratio
- Runs too fast despite fine grind: The bean is dense; try an even finer grind setting
- Lacks sweetness: Extend extraction time slightly and increase temperature together
-
Dark roast symptoms and fixes:
- Tastes bitter or ashy: Lower temperature by 1 to 2°C, or shorten yield to a 1:1.5 ratio
- Runs too slow: Coarsen grind; dark roasts are more porous and flow faster at equivalent grind settings
- Flat or one-dimensional: Try a shorter ratio for more concentrated sweetness
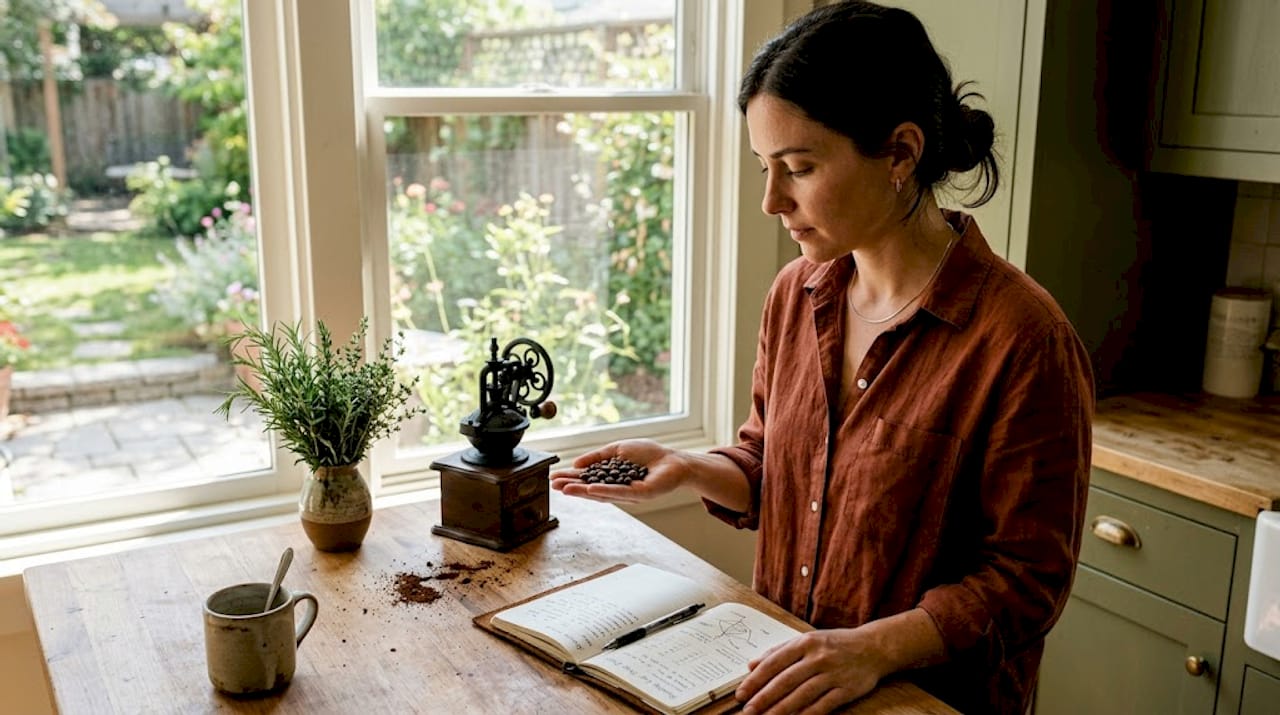
Bean freshness matters just as much as roast level. Espresso made from beans roasted within the past two to four weeks extracts more evenly and produces better crema than stale coffee. Very fresh beans, roasted within the last three to five days, can be gassy and cause inconsistent shots due to CO2 off-gassing. The sweet spot for most espresso beans is seven to twenty-one days post-roast.
Pro Tip: Always check the roast date on your bag, not the “best by” date. A best-by date tells you almost nothing about peak freshness for espresso. If the roast date isn’t printed, that’s a red flag about the producer’s transparency and likely the coffee’s freshness.
For more on how bean origin and processing affect flavor, enhance coffee flavor breaks down the variables that matter most. And if you want a full reference for all brewing methods and how bean choice affects each one, the coffee brewing guide is a solid resource.
The truth most guides miss: Why process is king, not recipe
Most espresso guides hand you a recipe: 18 grams in, 36 grams out, 93°C, 28 seconds. Follow it and you’ll get great espresso. That’s the promise. Here’s the problem: that recipe was dialed in for a specific grinder, a specific machine, a specific bag of beans, and a specific barista’s prep technique. None of those are yours.
The real skill in home espresso is not memorization. It’s diagnosis. When you learn to read a shot, taste the extraction, and identify which variable is responsible for the problem, you stop being dependent on recipes written for someone else’s setup. You build a process that belongs to your kitchen, your machine, and your palate.
This is why we’d argue that chasing a “perfect recipe” is actually one of the most common traps in home espresso. It creates a fixed-answer mindset in a system that demands flexible thinking. Every new bag of beans, every season change (humidity affects grind), every descale of your machine resets the variables slightly. A recipe won’t save you. A process will.
The baristas who consistently pull great shots are not the ones who memorized the most recipes. They’re the ones who built a diagnostic habit: pull a shot, taste it, identify the variable, make one change, repeat. That loop, practiced consistently, is worth more than any recipe book.
Tracking your variables and results, even informally, creates a custom workflow tuned to your exact setup. Over time, you’ll find that you can walk up to your machine, pull a shot, and know within the first sip exactly what needs to change. That’s what real mastery feels like, and it has nothing to do with memorizing numbers.
For a broader look at what separates good coffee from exceptional coffee, coffee quality standards covers the professional benchmarks that apply just as well at home as in a café.
Upgrade your home espresso experience with Z’s Coffee
Ready to transform your espresso results into café-quality experiences? Here’s how Z’s Coffee can help you build on what you’ve learned.
Everything you’ve read in this guide depends on one thing above all else: starting with great coffee. Technique can only take you so far if your beans are stale or poorly sourced. At Z’s Coffee, we curate a global selection of fresh, specialty-grade coffee and tea products designed for exactly the kind of intentional brewing you’ve been practicing.

Browse our shop fresh coffee collection to find single-origin beans and blends that match your roast preference and brewing style. If you’re always on the move between morning pulls, our travel mugs keep your espresso at the right temperature wherever you go. And for days when the machine stays cold, our instant coffee options deliver a surprisingly satisfying cup without the setup. Z’s Coffee ships internationally, so no matter where you brew, great coffee is one click away.
Frequently asked questions
What is the ideal espresso brew ratio for beginners?
Start with a 1:2 ratio, meaning 18 grams of coffee in and 36 grams of liquid out, targeting an extraction time of 25 to 30 seconds. This is the standard specialty starting point that gives you a balanced baseline to adjust from.
Should I measure espresso by volume or weight?
Always measure by weight in grams because crema adds visual volume without adding coffee solids, making volumetric measurements unreliable and inconsistent from shot to shot.
Why does my espresso taste sour or bitter?
Sourness signals under-extraction, often caused by a grind that’s too coarse or water that’s too cool. Lighter roasts over-extract easily at high temperatures, while darker roasts can turn bitter fast, so adjust grind size, temperature, and brew ratio to correct either direction.
What is channeling, and how can I prevent it?
Channeling happens when water finds a weak path through the puck instead of flowing evenly, usually caused by uneven tamp or distribution. Prevent it by using a WDT tool to distribute grounds before tamping and applying level, consistent pressure every time.
How does roast level affect espresso extraction?
Lighter roasts need hotter water and longer extraction to develop sweetness, while dark roasts are more porous and over-extract quickly, benefiting from lower temperatures and shorter yield ratios to avoid bitterness.